Secure Your Mac: Managing Your MacKeeper Login Account

In today’s digitally driven environment, protecting your personal data, device performance, and online privacy has never been more critical. MacKeeper Login As cyber threats continue to evolve, so must the tools we rely on to guard our digital lives. MacKeeper is one such solution—a comprehensive macOS software suite designed to clean, optimize, and protect your system. At the center of this protection lies your login portal. Knowing how to secure your Mac: managing your MacKeeper login account effectively can help you take control of your digital security and privacy like never before.

Whether you are a seasoned user or new to the world of Mac optimization and cybersecurity, understanding your MacKeeper login account is essential. Login MacKeeper From accessing security features and managing personal data to troubleshooting access issues and enhancing account security, your login credentials are the key to unlocking a full suite of protection and performance tools.

The Critical Role of Your MacKeeper Login Account

Your MacKeeper login account acts as the central hub for your entire security infrastructure. It ties your software license to your identity, allowing you to access antivirus tools, schedule performance scans, MacKeeper Login clean your system, protect your browsing activity, and contact technical support.

When you think about what it truly means to secure your Mac: managing your MacKeeper login account, it becomes clear that this process is about more than just logging in. It involves maintaining the integrity of your system through timely updates, secured authentication, proactive monitoring, and smart management of account features.

MacKeeper’s platform depends on an active and authenticated login to deliver real-time protection. With your login account, you can synchronize updates, connect multiple devices if your plan allows, Login MacKeeper and receive personalized alerts about system vulnerabilities. The importance of this login cannot be overstated in the broader mission to protect your Mac and your personal data.

Creating Your MacKeeper Account

To begin the process of managing your MacKeeper account, the first step is account creation. When you purchase or install MacKeeper, you are prompted to register with an email and password. This registration links your license to your profile and activates all included features.

During this step, it is essential to use a valid email address and to create a strong, unique password. MacKeeper Login Your password should contain a mix of uppercase and lowercase letters, numbers, and special symbols to ensure resilience against brute-force attacks.

By completing this step, Login MacKeeper you establish your digital identity within the MacKeeper ecosystem. This foundational process sets the tone for your future interactions with the software and lays the groundwork for everything related to secure your Mac: managing your MacKeeper login account.

Accessing the Account Interface

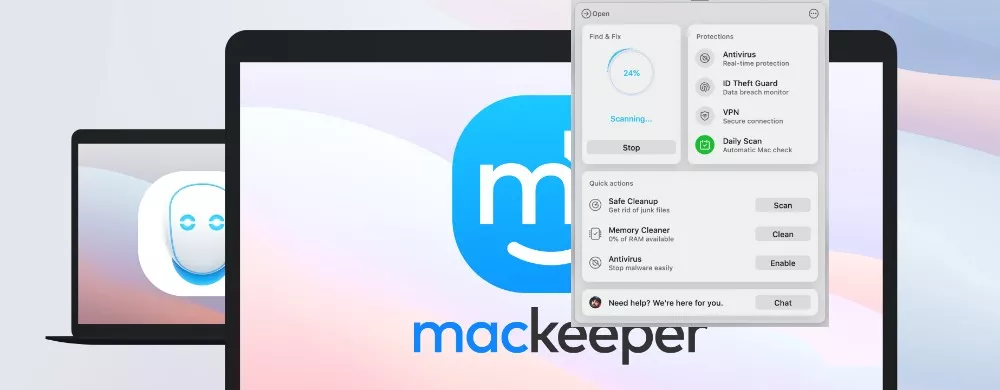
After installation and account creation, you can access your login account through the MacKeeper application on your Mac. The interface is designed for user-friendliness, making it easy to view your account status, Login MacKeeper license details, and access the suite of tools that come with your plan.

Once inside, the dashboard provides a visual overview of your Mac’s health, including memory usage, storage status, malware protection, and privacy status. MacKeeper Login This panel is only available to authenticated users, reinforcing the importance of securing your login information.

Accessing your account interface is also the first step in taking full control of your system’s security posture. By doing so, you’re actively participating in the broader mission to secure your Mac: managing your MacKeeper login account properly and proactively.

Monitoring Your Subscription and Licensing

A key feature of your login account is subscription management. From within the account interface, you can view your current subscription plan, its expiration date, and any active licenses tied to your email address. You can also upgrade, renew, or cancel your subscription from here.

Understanding and managing your license ensures that you are not caught off guard by an expired plan or a reduction in service. More importantly, Login MacKeeper an active subscription ensures that antivirus definitions remain updated, malware detection remains functional, and new features continue to be delivered to your device.

Effectively managing your subscription is one of the most crucial parts of learning how to secure your Mac: managing your MacKeeper login account thoroughly. It keeps your protection uninterrupted and guarantees access to the latest digital security tools.

Changing and Updating Account Credentials

Your MacKeeper login credentials are your first line of defense against unauthorized access. If you suspect that your email or password has been compromised, you must act quickly. MacKeeper Login Changing your account password is a straightforward process that begins within the account settings menu.

You should regularly update your password to reduce the risk of account breaches. When doing so, avoid reusing passwords from other sites or using predictable patterns. Login MacKeeper Using a password manager can help you create and store complex passwords securely.

Beyond just password changes, updating your contact email if necessary ensures you never lose access due to an outdated address. This is an often-overlooked step, but it plays a vital role in how to secure your Mac: managing your MacKeeper login account with foresight and responsibility.

Implementing Two-Factor Authentication

While not always a default feature, two-factor authentication (2FA) is becoming a standard security practice for software platforms. If MacKeeper supports 2FA in your version, it is highly recommended to enable it. This adds a second layer of verification beyond just your password, significantly reducing the risk of unauthorized access.

Two-factor authentication typically involves a time-sensitive code sent to your phone or email. Even if a hacker guesses your password, they would still need access to your second authentication method to gain entry. This feature exemplifies the modern standards of account protection and is an important component of how to secure your Mac: managing your MacKeeper login account effectively.

Troubleshooting Login Issues

Access problems can occur for various reasons, from simple typos to more complex issues like expired subscriptions or network errors. Knowing how to troubleshoot these problems is part of successfully managing your MacKeeper login experience.

First, confirm that your internet connection is stable. MacKeeper relies on online validation to authenticate accounts and synchronize updates. Next, double-check your email and password. MacKeeper Login Ensure that the caps lock is off and that there are no extra spaces accidentally included during input.

If the login still fails, use the password reset function to generate a secure new login credential. Occasionally, reinstalling the application or clearing cache files may resolve stubborn login loops or bugs. Understanding these steps helps you maintain consistency and continuity as you aim to secure your Mac: managing your MacKeeper login account seamlessly.

Understanding Session Management and Auto-Login

Many users prefer to stay signed in for ease of use, especially when using a personal device. MacKeeper may offer options to remember login credentials or maintain session status between uses. Login MacKeeper While convenient, users must weigh the trade-off between convenience and security.

If you use a shared device or occasionally allow others access to your Mac, it is advisable to log out of your MacKeeper account after each session. This reduces the risk of unauthorized changes to settings or misuse of premium tools tied to your subscription.

Knowing how session management works and how to use it responsibly is a valuable part of how to secure your Mac: managing your MacKeeper login account in real-world settings.

Enhancing Privacy Through Account Settings

Privacy protection is one of MacKeeper’s standout features. Within your account dashboard, you may find options to manage tracking prevention, VPN access, ad blocking, and browser extensions. These tools operate more efficiently when they are configured and managed through your authenticated account.

Customizing these features to suit your personal or professional needs allows you to enjoy a safer browsing experience. MacKeeper Login Whether you need to mask your location, block suspicious websites, or anonymize your online behavior, proper use of your login account enhances the effectiveness of all these privacy features.

Taking time to personalize these settings is one more way you can actively secure your Mac: managing your MacKeeper login account with precision and care.

Protecting Children and Family Accounts

For users managing devices for children or family members, your login account becomes a central authority for ensuring safe usage. Through account settings, Login MacKeeper you can activate features that limit exposure to harmful content, disable risky apps, and schedule cleanup tasks.

Although MacKeeper is not classified as parental control software, its optimization and security features can be tailored to create a safer digital environment for younger users. Using the MacKeeper account as a supervisory tool reflects a modern approach to device protection and supports your goal to secure your Mac: managing your MacKeeper login account holistically.

Keeping Software and Security Features Up to Date

The MacKeeper software regularly receives updates that include bug fixes, new tools, and improved performance features. These updates are often tied to your login account, MacKeeper Login which verifies your eligibility and synchronizes your software with the latest enhancements.

By staying logged in and maintaining an active account, you guarantee your Mac remains protected by the most recent security patches and optimization strategies. Neglecting software updates can leave you exposed to threats or performance degradation, which runs counter to the mission of secure your Mac: managing your MacKeeper login account correctly.

Customer Support and Account Recovery

In situations where login fails despite all troubleshooting attempts, MacKeeper’s customer support team offers assistance through your registered email. Login MacKeeper Providing your account details allows the support team to investigate issues, reset credentials, or restore access if your account has been compromised or locked.

The speed and effectiveness of customer support often depend on the accuracy of your account information. Make sure your registered email and payment history are always up to date to avoid delays. This proactive stance supports your efforts to secure your Mac: managing your MacKeeper login account during emergencies or unexpected technical problems.

Why Regular Login Matters for Security

Logging in to your MacKeeper account regularly ensures that your device receives real-time protection, alert notifications, and software updates. More importantly, it verifies that your account remains active and free of any unauthorized access.

Frequent login also allows you to spot irregularities early, such as failed login attempts or unexpected device logins. This vigilance is essential in maintaining both the health of your Mac and the security of your user data.

Building a habit of regular check-ins aligns with best practices in digital hygiene and contributes to the broader mission to secure your Mac: managing your MacKeeper login account with diligence and awareness.

Final Thoughts: Taking Ownership of Your Digital Safety

At the heart of every protected Mac is a user who understands the tools they are using. Your MacKeeper login account is more than just a username and password—it’s a digital command center. MacKeeper Login It holds the power to defend your device, optimize its performance, and protect your privacy in a constantly evolving digital world.

By learning the ins and outs of how to secure your Mac: managing your MacKeeper login account, you place yourself in control. You protect your personal information, ensure peak system functionality, and stay ahead of potential threats.

This guide is your starting point. Login MacKeeper Continue to educate yourself, stay informed about software updates, and maintain strong digital habits. In doing so, you’ll not only be using MacKeeper effectively—you’ll be securing your Mac with intelligence, precision, and confidence.

How To Access Your MacKeeper Login Account: A Step-by-Step Guide

In today’s digitally connected world, maintaining the security and performance of your Mac is essential. MacKeeper has long been a trusted solution that combines antivirus protection, MacKeeper Login performance optimization, privacy management, and cleanup tools. Whether you are a new user or a returning customer, understanding how to access your MacKeeper login account: a step-by-step guide is the gateway to maximizing your experience with this all-in-one macOS utility.

A MacKeeper account acts as your personal dashboard. It stores subscription details, licenses, technical support access, and real-time protection tools in one centralized location. MacKeeper Login This comprehensive guide is crafted to help users confidently navigate the login process, troubleshoot common issues, and make the most of their MacKeeper account while preserving system integrity and digital privacy.

Understanding the Importance of Your MacKeeper Login Account

Your MacKeeper login account is not just a simple entryway to software features—it is a full-fledged control panel that manages your cybersecurity settings, system performance tools, and subscription access. When you know exactly how to access your MacKeeper login account: a step-by-step guide, you empower yourself to maintain full control over your system’s safety and stability.

An active account ensures your Mac remains protected from malware, adware, phishing, and suspicious applications. It provides tools for cleaning junk files, removing duplicates, MacKeeper Login managing login items, and even securely browsing through a VPN feature included in higher-tier plans. The login credentials bind your MacKeeper services to your device, so being able to access and manage them is vital for both casual and professional users.

Initial Account Setup Before Login

Before accessing your login portal, you must first have a registered MacKeeper account. During installation or purchase, users are prompted to create one. If you bought the software through the official MacKeeper website or via promotional platforms, your account is usually created as part of the checkout process.

To ensure a smooth sign-in experience, verify your email address after registration. This validation ensures that your account becomes active and avoids login problems later. After email confirmation, your account is linked to your license key and is ready to use.

If your MacKeeper setup was bundled with a third-party offer or came pre-installed, you will still need to create your personal login by registering with your email and setting a password. Once you complete this process, you are prepared to proceed with how to access your MacKeeper login account: a step-by-step guide seamlessly.

Launching MacKeeper on Your Device

The first step in accessing your login account begins with opening the MacKeeper application on your Mac. You can do this by locating the MacKeeper icon in the Applications folder or from your dock if you’ve pinned it there.

After launching the app, you are presented with a user-friendly interface. If your session has expired or if it’s the first time you’re launching the software post-installation, you will be automatically prompted to log in. The login window requests your email address and password credentials. This is where your journey in learning how to access your MacKeeper login account: a step-by-step guide truly begins.

Inputting Your Credentials Accurately

In the login window, type in the email address associated with your MacKeeper account. Make sure the email is correctly entered without typos or unnecessary spaces. Then, carefully type your password. Passwords are case-sensitive, so double-check for accidental use of the caps lock key or input errors.

Once both fields are completed correctly, proceed with the sign-in. MacKeeper Login If the credentials match the system database, you will be directed to the MacKeeper dashboard. This is where you can monitor security alerts, access premium tools, run scans, and review your Mac’s performance metrics.

What To Do If You Forget Your Password

Forgetting passwords is a common issue. If you cannot remember your password during your login attempt, use the password recovery feature available on the login screen. Click the “Forgot Password” link, and you will be prompted to enter your registered email address.

A secure reset link is then sent to your email. Open that message, follow the provided instructions, and set a new password. Once the password is reset, you can return to the application and log in using the new credentials. Being familiar with this process is an important aspect of how to access your MacKeeper login account: a step-by-step guide, especially when dealing with long-term use.

Maintaining a Stable Internet Connection

Because MacKeeper communicates with its server to verify login credentials, a stable internet connection is crucial. Without internet access, you may not be able to complete the login process. Make sure your Wi-Fi or Ethernet connection is active and functioning correctly before launching MacKeeper.

Interruptions during the login process could result in timeout errors or repeated credential prompts. Avoid using unsecured public networks while accessing your account, as this could expose your login data to security risks. Knowing how to access your account securely is a key part of understanding how to access your MacKeeper login account: a step-by-step guide.

Navigating the MacKeeper Dashboard Post Login

Once logged in, you enter the MacKeeper dashboard—a clean, intuitive interface that categorizes all of the application’s tools and services. The dashboard provides real-time system health updates, antivirus status, memory optimization options, and privacy controls.

From this panel, you can initiate malware scans, run cleanup processes, monitor system performance, and launch privacy features like VPN and anti-tracking. MacKeeper Login Having complete access to the dashboard ensures that you are not only protecting your Mac but also enhancing its speed, storage, and responsiveness.

The dashboard also contains account settings where you can manage your license, renew subscriptions, or contact customer support. These features underline the necessity of learning how to access your MacKeeper login account: a step-by-step guide in full detail.

Troubleshooting Login Errors

Sometimes, users encounter issues while attempting to access their MacKeeper login account. These issues may include incorrect credentials, connection failures, software bugs, or expired licenses. Here’s how to handle them effectively:

Check for typos in your email or password. Even a minor mistake can prevent successful login

Ensure that your MacKeeper application is updated to the latest version. MacKeeper Login Outdated software may have login compatibility issues

Make sure your internet connection is active and stable

Clear MacKeeper’s cache or perform a fresh installation if persistent login loops occur

Review your subscription status in your email or purchase invoice to confirm that your account is active and not expired

If problems persist, reach out to MacKeeper’s customer support team directly from the login screen or via the official support channels. Prompt assistance will be provided based on your account email

Knowing these troubleshooting techniques is part of the larger framework of how to access your MacKeeper login account: a step-by-step guide, particularly for users who rely on the software daily.

Keeping Your Account Secure

Security is one of the cornerstones of the MacKeeper platform. MacKeeper Login That principle extends to your login account. To ensure your account remains secure:

Use a unique, strong password that includes letters, numbers, and special characters

Change your password periodically to reduce risks of unauthorized access

Avoid logging in from unfamiliar or public computers

Never share your login credentials with others

Always log out from the application if you are using a shared device

These precautions are vital parts of how to access your MacKeeper login account: a step-by-step guide, especially for users who value their privacy and want to avoid breaches.

Benefits of Regular Login to Your Account

By consistently accessing your account, you keep your MacKeeper services in sync with real-time protection updates. Logging in regularly enables:

Automatic virus definition updates

Scheduled scanning and system monitoring

Faster support responses due to active license tracking

Access to the latest features rolled out through software updates

Enhanced optimization tools and privacy modules tied to your subscription

Consistent login helps maintain the connection between your software and the server, ensuring maximum performance and accuracy in threat detection.

Managing Subscription and Account Details

Inside your account dashboard, you can also manage essential subscription elements such as:

Renewing your license

Upgrading to advanced plans

Changing billing details

Viewing transaction history

Downloading invoices for corporate records

These features give you complete control over your MacKeeper experience. Understanding this element of how to access your MacKeeper login account: a step-by-step guide allows you to be a more informed user.

Linking Multiple Devices to One Account

Some MacKeeper licenses allow multiple Macs to be protected under one account. If your plan supports it, you can log in on additional devices using the same credentials. This centralized management system simplifies protection for households or small teams using Apple computers.

From a single dashboard, you can manage:

Device security status

Scan history and threat reports

Performance metrics

This multi-device approach adds convenience and control to your digital security infrastructure, making it essential to understand how to access your MacKeeper login account: a step-by-step guide effectively.

Best Practices for Logout and Session Management

While staying logged in on a personal device is safe, it is wise to sign out after each session on shared systems. To log out, visit your account panel and choose the sign-out option. MacKeeper Login This prevents unauthorized changes to your settings or software license misuse.

If MacKeeper provides automatic session expiration settings, consider enabling them for added security. These measures round out your understanding of how to access your MacKeeper login account: a step-by-step guide with responsible user behavior.

Conclusion: Mastering the MacKeeper Login Experience

Learning how to access your MacKeeper login account: a step-by-step guide is fundamental to harnessing the full potential of this comprehensive macOS protection tool. From launching the application to managing your subscription, from securing your credentials to accessing performance boosters, each aspect of account access is integral to keeping your Mac safe, fast, and optimized.

A MacKeeper login account is not just a gateway—it’s your digital control center. MacKeeper Login By mastering the login process, you ensure your software functions as intended, keeps your system protected, and maintains your peace of mind in a constantly evolving digital landscape.

Stay updated, stay protected, and always keep your login credentials secure. Because the better you understand how to access your MacKeeper login account: a step-by-step guide, the more empowered you are to guard your digital life with confidence.

Sign in to your Mackeeper Antivirus Account – Mackeeper

In a digital era where threats lurk around every corner of the internet, protecting your Mac from malware, phishing attacks, spyware, and performance decline is non-negotiable. Sign in Mackeeper has become one of the most widely trusted antivirus and system optimization solutions exclusively designed for macOS. As a user, understanding how to sign in to your Mackeeper Antivirus Account – Mackeeper is essential to unleash the full range of tools and protections offered by the software.

Your Mackeeper account is your personal command center. It allows you to activate premium tools, receive real-time protection updates, configure your privacy settings, manage your license, and connect with professional tech support. In this detailed article, we will guide you through Sign in Mackeeper everything you need to know about signing in, maintaining account security, solving login issues, and making the most of your antivirus dashboard.

What is Mackeeper Antivirus and Why an Account Matters

Before exploring the mechanics of how to sign in to your Mackeeper Antivirus Account – Mackeeper, it’s important to understand what makes Mackeeper a standout antivirus solution. Mackeeper is an all-in-one utility suite tailored for Mac users, combining antivirus protection, performance tools, Sign in Mackeeper privacy services, and cleaning utilities.

Creating and maintaining an active account ensures that your subscription remains valid, your protection is up to date, and all features are accessible. Without a properly signed-in account, you lose access to core functions like scheduled scans, real-time protection, VPN browsing, adware removal, and smart uninstaller features.

The Mackeeper account serves as a central hub where your preferences, subscription status, device tracking, and security controls are housed. Without logging in, your user experience remains limited to basic features, and any paid benefits are inaccessible.

The First Step: Account Creation Before Signing In

To sign in to your Mackeeper Antivirus Account – Mackeeper, you must first register and create your account. During the initial setup of the software, users are typically prompted to register using a valid email address and create a secure password. This is a mandatory process to unlock the full potential of the antivirus suite.

If you purchased Mackeeper from its official website, your account is often generated at the point of purchase. Once you confirm your email, you receive access to your personalized dashboard. Sign in Mackeeper New users are encouraged to verify their email promptly to ensure account activation and seamless sign-in.

How to Sign in to Your Mackeeper Antivirus Account – Mackeeper

Accessing your Mackeeper account is a simple yet crucial process. The sign-in feature ensures you are linked to your license and receive automatic updates and technical support. Here’s how you can proceed to sign in to your Mackeeper Antivirus Account – Mackeeper:

Begin by launching the Mackeeper software installed on your Mac. You will be prompted with the sign-in screen if the session has expired or if the app detects a new login requirement.

Enter your registered email address in the login field. This must be the same address used during purchase or initial registration.

Input your secure password in the password field. Sign in Mackeeper Ensure accuracy with case sensitivity, and double-check that Caps Lock is not enabled.

Click on the sign-in button located within the application window. If the credentials are accurate, you will be directed to the full control dashboard where all features and modules become available.

If your system remains signed in from a previous session, you might be taken directly to the dashboard without a new sign-in request. This usually depends on your session settings.

Common Issues While Signing In and How to Fix Them

While the sign-in process is designed to be seamless, users occasionally encounter issues that block their access. Here are common problems and practical solutions to ensure you regain access quickly.

Incorrect Password
One of the most frequent problems is entering the wrong password. If you’re unsure of your password, use the “Forgot Password” feature located on the sign-in page. You will receive an email with instructions to reset it securely.

Wrong Email Address
Users often forget which email they used to register. Try checking your purchase receipt or confirmation emails to find the correct email associated with your Mackeeper account.

Account Not Activated
Some users skip the email verification step during account creation. Without verification, your account remains in a pending state. Locate the verification email in your inbox or spam folder and follow the instructions.

Expired Subscription
If your subscription has lapsed, you may encounter limited access to features. Signing in should still be possible, but you will be prompted to renew your subscription to regain full access.

Connectivity Problems
Signing in requires a stable internet connection. Ensure your Mac is connected to Wi-Fi or Ethernet before attempting to access your account.

App Not Updated
Using an outdated version of Mackeeper may cause sign-in compatibility issues. Always update to the latest version of the software to ensure smooth performance.

Securing Your Mackeeper Antivirus Account

Security is the cornerstone of antivirus software. Sign in Mackeeper It’s not just about protecting your device but also safeguarding your account credentials. Here are essential tips to keep your account protected:

Use a complex password that includes letters, numbers, and special characters

Avoid using public computers to sign in to your Mackeeper Antivirus Account – Mackeeper

Do not share your login credentials with anyone

Sign out of your account when using a shared Mac

Enable two-factor authentication if Mackeeper adds support for it in the future

Monitor your account for unusual activity or login attempts

By following these practices, you create an extra layer of security that ensures your antivirus suite and your data remain uncompromised.

Benefits of Signing in Regularly

Frequent sign-ins help ensure that your antivirus software stays connected to the Mackeeper cloud. This connection is vital for receiving the latest virus definitions, Sign in Mackeeper software patches, and real-time protection updates.

Some benefits include:

Automated threat scanning that runs in the background

Timely virus database updates

Cloud-based threat detection to recognize new malware variants

Instant access to premium features such as VPN, ID theft guard, and performance boosters

Customer support access for resolving technical problems

When you sign in to your Mackeeper Antivirus Account – Mackeeper, the application tailors its features to your system configuration, usage habits, and subscription plan. This personalized experience cannot be accessed while logged out.

Features Accessible After Signing In

Once you successfully log into your account, the full suite of Mackeeper features becomes available. The dashboard presents a well-organized interface that allows you to:

Initiate real-time antivirus scans

Schedule regular deep scans for hidden malware

Enable adware removal to eliminate popups and trackers

Activate private VPN browsing for secure internet use

Optimize your Mac’s speed through memory cleaner and junk remover tools

Use duplicate file finders to free up storage

Uninstall redundant apps using the smart uninstaller feature

Monitor app permissions and background activity

All these tools work best when linked to an active and signed-in Mackeeper account.

Managing Your Mackeeper Subscription

Your account also serves as a gateway to subscription management. By signing in, you can check your plan status, update payment methods, Sign in Mackeeper change billing preferences, and explore available upgrades or add-ons.

Maintaining control over your subscription ensures that:

You receive uninterrupted protection

You can cancel or modify your plan when needed

You are notified of discounts, promotions, or upgrades

Having direct access to these controls within your account saves time and adds transparency to your user experience.

Remote Access and Multi-Device Monitoring

One advanced feature that comes with account access is the ability to monitor multiple Mac devices under the same account. This is especially useful for households or small businesses managing several machines.

Each device can be linked to a central Mackeeper account where you can:

Track antivirus performance per device

Initiate scans remotely (if the feature is available)

Check subscription coverage across all devices

Sign in to all machines using the same master account credentials

This centralization makes managing digital security more efficient and less prone to oversight.

Updating Your Account Credentials

It’s advisable to periodically update your login credentials for enhanced security. After you sign in to your Mackeeper Antivirus Account – Mackeeper, navigate to the account settings where you can:

Change your password

Update your email address

Modify your contact information

Manage notification preferences

Keeping this information current ensures that you never miss out on important security alerts or subscription renewals.

Support and Assistance Within the Account Dashboard

Mackeeper provides a robust customer support system that is accessible only when you are logged in. From the account dashboard, you can reach out to:

Live chat agents for real-time troubleshooting

Technical support for advanced issues

Billing specialists for subscription-related questions

Product guides and knowledge bases for self-help

Having an account simplifies the support process because the system automatically identifies your license status, operating system, and account history.

Sign Out When Necessary for Enhanced Security

While staying logged in can be convenient, especially on your personal Mac, Sign in Mackeeper it is recommended to sign out after use on shared or public devices. This prevents unauthorized access to your settings, subscription, and antivirus tools.

To sign out, simply navigate to your account settings within the app and click the “Sign Out” option. You can always sign back in with your email and password whenever needed.

Conclusion: Why Signing In is the Heart of the Mackeeper Experience

The ability to sign in to your Mackeeper Antivirus Account – Mackeeper is more than just a login process. It is the key to unlocking world-class digital protection tailored specifically for Mac users. Sign in Mackeeper From malware detection to system performance, data privacy to technical support, everything is tied to your account.

By understanding how to sign in, how to troubleshoot issues, and Sign in Mackeeper how to secure your credentials, you take full control of your antivirus protection. Make signing into your Mackeeper account a routine part of your digital life to ensure that your Mac stays optimized, secure, and free from online threats.

Treat your Mackeeper account with the same seriousness you apply to your most sensitive digital tools. Because behind every secure Mac is a user who understands the power of staying connected to their protection suite.

Login to your MacKeeper Account – Mackeeper

In today’s digital world, cybersecurity and performance tools are more essential than ever. MacKeeper Login has emerged as a leading software suite for Mac users, offering robust utilities that include antivirus protection, performance optimization, privacy enhancements, and system cleaning tools. MacKeeper Login Whether you are a first-time user or a returning customer, understanding how to securely and smoothly login to your Mackeeper account – Mackeeper is essential for accessing all its valuable features.

This comprehensive guide is crafted to walk you through every detail related to accessing your account, troubleshooting login problems, understanding account features, and making the most of your MacKeeper membership. MacKeeper Login It’s more than just entering credentials; it’s about securing your Mac with a trusted companion.

Understanding the Mackeeper Platform

Before diving into the process of how to login to your Mackeeper account – Mackeeper, it’s important to grasp what MacKeeper is and what it offers. Developed specifically for macOS, MacKeeper combines multiple tools in one application: antivirus, adware removal, memory cleaner, MacKeeper Login duplicate finder, and VPN, among others.

The strength of the MacKeeper platform lies in its user-friendly interface, MacKeeper Login which integrates these tools into a centralized dashboard. Your account is the gateway to this dashboard, which is why managing your login details is crucial.

Why Creating and Logging Into a MacKeeper Account Matters

Creating and regularly logging into your account ensures you have full access to:

  • All premium features included in your subscription plan
  • Real-time antivirus protection and system updates
  • Cloud-based backup and secure browsing
  • Premium customer support and technical assistance
  • Usage tracking and performance optimization tools

Logging into your account also ensures that your license is active and your Mac is being protected consistently. The account also links to your billing details and renewal preferences, helping you manage your subscription effortlessly.

Getting Started: Create Before You Login

For new users, before you login to your Mackeeper account – Mackeeper, you first need to create an account. This typically happens during your initial software installation or purchase. When you download the MacKeeper software and activate it using your email address, an account is automatically created for you.

During the signup process, you’re asked to provide basic details such as your name, email address, and password. These credentials become your login credentials. MacKeeper Login It is important to remember these details and use a strong password that combines letters, numbers, and special characters.

Step-by-Step Guide to Login to Your MacKeeper Account – Mackeeper

The process to login to your Mackeeper account – Mackeeper is straightforward and designed to be seamless for users of all experience levels. Here’s how you can access your account:

Begin by launching the MacKeeper application on your Mac. Once opened, you’ll be prompted with the login screen if you’re not already signed in. You can also find the login option in the upper menu bar within the application window.

Enter your registered email address in the designated field. This should be the same email address you used during the account setup or purchase.

Input your password carefully. Remember that passwords are case-sensitive. Ensure that Caps Lock is not accidentally turned on.

Once your email and password have been entered, click the “Sign In” button. If your credentials are correct, you will be directed to the main dashboard where you can access the full range of MacKeeper’s tools.

What to Do If You Can’t Login to Your Mackeeper Account – Mackeeper

It’s not uncommon to encounter login issues. MacKeeper Login Here are common problems and how to resolve them.

Forgotten Password: If you cannot remember your password, use the “Forgot Password” link on the login page. You will receive a reset email allowing you to create a new password.

Incorrect Email: Double-check that you are using the correct email address associated with your account. Mistyped or outdated emails will prevent access.

Account Not Activated: Ensure that you have verified your email address. Sometimes, a confirmation link is sent during the signup process that needs to be clicked to activate the account.

Subscription Expired: If your subscription has expired, some features may be locked, but you should still be able to login. Renewing your plan can restore full access.

Internet Connection Issues: Since MacKeeper’s authentication process may rely on an internet connection, ensure that your Wi-Fi or Ethernet is stable.

Secure Login Practices for Your MacKeeper Account

Security should never be taken lightly, especially MacKeeper Login when dealing with cybersecurity software. Here are a few tips to keep your MacKeeper account safe:

  • Avoid using public or shared computers to login to your Mackeeper account – Mackeeper
  • Enable two-step verification if available
  • Update your password regularly
  • Do not share your login credentials with anyone
  • Always logout of your account after use, especially on shared devices

By maintaining these habits, you greatly reduce the risk of unauthorized access to your MacKeeper account and ensure that your digital footprint remains secure.

What You Can Do Once You Login to Your MacKeeper Account – Mackeeper

After a successful login, the dashboard becomes your command center. Here’s a breakdown of what you can manage:

Real-Time Antivirus Scans: Initiate or schedule full system scans for malware, ransomware, and viruses. The account interface shows previous scan histories, threats found, and recommended actions.

Performance Optimization: Access tools such as memory cleaner, login items manager, and junk file remover to improve your Mac’s speed and responsiveness.

Privacy Protection: Use the built-in VPN to mask your online identity and protect your internet activities. You can also check for data breaches involving your email address.

Smart Uninstaller: Identify and remove unused or harmful applications to free up storage and maintain a healthy Mac environment.

System Updates and Alerts: Receive alerts about outdated apps, system vulnerabilities, and recommended optimizations—all personalized to your usage.

Customer Support: Directly contact MacKeeper’s support team from the interface. Chat options and ticket submission are available within the account section.

Keeping Your Mackeeper Account Updated

Logging into your account frequently allows you to ensure that your software is updated and all modules are functioning correctly. It also helps you:

  • Keep track of your subscription status and renewal dates
  • Update billing information
  • Modify email or contact details
  • Upgrade or downgrade your plan
  • Review and manage connected devices

Staying active in your account helps prevent service interruptions and keeps your Mac protected at all times.

Benefits of Managing Multiple Devices from One Account

If you have more than one Mac device, managing them under one MacKeeper account is not only possible but highly efficient. Once logged in, you can see all linked devices and monitor their status, MacKeeper Login protection level, and required actions. This is particularly useful for households or small businesses.

You can:

  • Activate MacKeeper on multiple devices
  • See antivirus scan results for each device
  • Use remote access features (if enabled) for troubleshooting

Importance of Email Verification and Alerts

Upon first creating your account, MacKeeper sends a verification email. It’s crucial that you verify your email address, as it links your account to vital communications such as:

  • Password reset requests
  • Subscription renewal reminders
  • Security breach alerts
  • Software update announcements

Failing to verify your email can cause login delays and prevent you from receiving critical account notifications.

Recovering Access Without Losing Data

If you’re unable to login to your Mackeeper account – Mackeeper and have exhausted standard troubleshooting steps, don’t panic. You can contact MacKeeper’s support team to recover access. You will be required to verify your identity and possibly provide proof of purchase.

Once access is regained, your system history, MacKeeper Login preferences, and performance records are usually intact, allowing you to continue protecting your Mac without starting over.

The Role of the Account in Subscription Management

Your MacKeeper account is tightly integrated with your subscription plan. When you login, you can:

  • Check plan type (monthly, yearly, etc.)
  • Review transaction history
  • Cancel or modify your subscription
  • Access loyalty benefits or limited-time offers

Managing your subscription through the account portal ensures transparency and helps avoid unexpected charges or service interruptions.

Conclusion: Why Logging In Regularly is Crucial

Regularly logging into your account keeps your Mac secure, MacKeeper Login your software updated, and your subscription active. Whether you’re performing system scans, activating the VPN, or contacting customer support, the account is the nerve center of your MacKeeper experience.

Understanding the process to login to your Mackeeper account – Mackeeper empowers you to stay in control of your digital environment. By following best practices, managing your credentials securely, and staying MacKeeper Login engaged with your dashboard, you can maximize the performance and safety of your Mac system.

Your MacKeeper account is not just a login—it’s a security command post. Treat it with the care and attention it deserves, and it will serve as a loyal guardian of your digital life.

How To Easily Access Bitdefender Antivirus Account? A Easily Guide

Protecting your digital life with cybersecurity tools is one thing—managing them effectively is another. Having easy, reliable access to your antivirus account ensures you stay in control of device protection, Login Bitdefender Antivirus software updates, subscriptions, and support. This detailed guide is designed to show you how to sign in effortlessly, navigate features smoothly, troubleshoot issues when they arise, Bitdefender Antivirus Sign in and perform common tasks securely. With the right approach, accessing your account becomes a seamless part of your routine.

Understanding Why Smooth Account Access Matters

Your antivirus portal is more than just a login page—it’s the command center for maintaining device safety. Inside, you can activate protection on new hardware, Login Bitdefender Antivirus update virus definitions, manage VPN access, control parental settings, analyze threat reports, renew your plan, and get technical help. Occasional barriers in logging in can prevent crucial actions like installing updates or fixing issues. Establishing an easy access workflow Bitdefender Antivirus Sign in ensures protection stays current and your license remains fully functional.

Prepping for a Trouble-Free Login Experience

Before you click the login button, take a moment to prepare:

  • Verify your username: This is usually the email address linked to your subscription.
  • Confirm your password: Ensure that you remember it, or note if you may need to reset it.
  • Choose a modern browser: Updated options like Chrome, Firefox, Edge, or Safari help avoid compatibility issues.
  • Check your internet connection: A stable, non-restricted network is important—public Wi‑Fi may block certain portals.
  • Ensure two‑factor readiness: If your account uses an authenticator app or email/SMS code, have that device and app available.
  • Turn off conflicting extensions temporarily: Ad blockers or VPNs might interfere; disabling them can help during sign-in.

Setting things up ahead of time cuts down on login errors and frustration.

Step-by-Step: How to Sign In Quickly

Follow these steps for a smooth sign-in experience:

Open your browser and type in the antivirus portal address manually. Avoid using outdated bookmarks.

Spot the button inviting you to access your account and click it.

On the login screen, type your email address accurately.

Enter your password—watch your capitalization carefully.

If prompted, complete the second factor by entering your security code from the authenticator or SMS.

Wait for the dashboard to load once your credentials are validated.

What to Expect After Signing In

Once you access your account, you’ll see key areas grouped neatly:

A section listing all devices currently protected.
Licensing details, including expiration and renewal status.
Downloads for installing protection on additional systems.
Security tools like VPN, Bitdefender Antivirus Sign in Safe Browsing, and Password Manager if included in your plan.
Reports on past alerts and recently blocked threats.
A support or help menu to send messages or start a live chat.

Becoming familiar with these areas makes ongoing management much simpler.

Setting Your Preferences Immediately

After logging in:

Enable notifications or alerts to be sent to your email.
Opt for two‑factor authentication if available, especially if account access is critical.
Set language preferences and time zone for accurate timestamps on logs.
Choose to stay logged in Login Bitdefender Antivirus when using trusted devices to skip frequent sign-in requests.
Review connected devices and revoke access for any you no longer use.

These initial touches help reduce friction down the road.

Troubleshooting Common Login Issues

If the login page doesn’t load at all:

Clear your browser cache and cookies.
Try accessing the site in private or incognito mode.
Disable any browser extensions that might block access.
Switch to cellular data or another network to rule out restrictions.

If your password doesn’t work:

Double-check for typos, and remember it is case-sensitive.
Initiate a reset using the “forgot password” option.
Check your inbox and spam folder for the reset email.
Create a new password that meets posted security requirements.

If two‑factor codes don’t arrive:

Verify your time and date settings are correct.
Open your authenticator app and wait for a fresh code.
Choose an alternate delivery method like SMS if available.
Use backup codes saved during setup.
Contact support if none of these solutions work.

Adding a Second Device to Your Account

To protect a new computer or mobile device:

Log into your account portal.
Locate your active license under device management.
Initiate the link or download process.
On the new device, install the protection software.
Open the software and sign in when prompted to activate through your account.

Once complete, the new device should appear in your portal. You’ll get a confirmation message too.

Removing Old Devices from Tracking

To manage your active device list:

Go to device settings in your account.
Select devices that are no longer in use.
Use the remove or deactivate option.

This helps you stay under license limits and improves dashboard clarity.

Renewing or Upgrading Your Plan

When it’s time to renew:

Inside your account portal, review expiration dates.
Click renew to access available plans and payment options.
Choose auto‑renewal if desired to avoid service interruptions.
Add features such as VPN or password manager upgrades if desired.
Confirm your selection and payment details.
After completion, your license status should update immediately.

Keep your device count and protection tier at the right level for your needs.

Managing Billing and Payments Safely

To update payment details:

Visit billing preferences within the portal.
Add or update card or bank information.
Set up auto‑renewal to prevent accidental expiration.
Check your history of invoices or receipts.

All reputable platforms use encrypted connections to protect this information.

Accessing Support When You Need It

If technical issues arise:

Click the support menu within your account dashboard.
Look for live chat or a send‑message form—writing is often convenient.
Useful details to include: OS version, software version, error message, and setup.
Support personnel can often see context, speeding up issue resolution.
Use chat Bitdefender Antivirus Sign in transcripts or ticket numbers for reference in future contacts.

Logging in first ensures full access to support features.

Exporting Logs for Diagnostics

If error conditions or slow behavior occur:

Go to troubleshooting logs or diagnostic tool area.
Download or export logs as requested.
Provide these logs to support via uploads in portal or chat.
Logs may clarify update failures, scan blocks, or compatibility issues that aren’t visible in the UI.

This helps resolve problems faster and with more insight.

Turning On Activity Alerts

To ensure you’re always informed:

Activate email or app notifications for security incidents.
Select alert types you want to track—virus detection, firewall alerts, etc.
Double-check that your inbox settings do not block these alerts.
You might also Login Bitdefender Antivirus

configure push notifications on mobile companion apps.

This ensures you stay ahead of threats.

Adjusting Security Levels and Settings

Within your portal or software:

Explore firewall, web protection, and ransomware shield settings.
Adjust sensitivity settings if scanning seems slow.
Manage exclusions for trusted files or software conflicts.
Save or revert profiles to test configurations if needed.

As you fine-tune, you’ll find a balance between performance and protection.

Enabling Two‑Factor Authentication

To enhance security:

Access account settings and locate two‑factor options.
Enable second‑factor verification and follow prompts.
Scan barcode in your mobile authenticator or verify via SMS.
Store backup codes in a safe location.
Try the login process Bitdefender Antivirus Sign in from a new browser to validate setup.

This secures your account and eases login steps.

Mitigating Account Lockouts

If too many failed attempts occur:

Systems may enforce short lockout periods.
Wait out the timeout and try again.
Use password reset if still unable.
Contact support with account information if lockout persists.

Being locked out protectively prevents unauthorized access.

Clearing Old Sessions

To log out from multiple devices:

Open account settings and review device session history.
Click sign‑out or “logout all sessions” to renew smart logins.
You may also receive alerts when new sessions start.

This gives you control and visibility over where you’re logged in.

Checking Access Logs for Security

To revisit login history:

Look for activity or history in your portal.
See dates, IP, and location of each login.
If any entry is unrecognized, change your password immediately.

These logs help you spot intrusions before they become serious.

Using Mobile Apps to Stay Connected

By installing the mobile protection app:

Launch and sign in with your credentials.
Grant permissions, such as VPN or notifications.
Remote Login Bitdefender Antivirus features appear on your mobile portal—scan request or device removal.
Biometric logins make future work easier.

Mobile apps let you manage protection even away from your computer.

When to Use a Different Browser

If login issues persist:

Try another major browser or use a private/incognito window.
This avoids interference from extensions or saved data.
If it works, troubleshoot the original browser’s data or extension conflicts.

Addressing Portal Outages

When nothing else helps:

Check provider’s service status if available.
Try logging in Login Bitdefender Antivirus later or from a different device.
Reach out to support to confirm system availability.

Once restored, the portal should accept logins like before.

Summing It Up

Accessing your antivirus account should be a hassle-free experience. By preparing your credentials, choosing a reliable browser, enabling security measures, and understanding common fixes, Login Bitdefender Antivirus you set yourself up for hassle‑free entry every time. Tasks like device additions, license management, renewals, and support requests become easier when your access is secure and consistent. Login Bitdefender Antivirus If trouble arises, follow the recovery steps quickly and keep support details on hand. Before long, accessing account features becomes a routine operation, Bitdefender Antivirus Sign in keeping your digital environment protected and up-to-date.

How Do I Access Your Bitdefender Account: A Step-by-Step Guide

Managing antivirus protection often means interacting with a remote account portal. Whether you use the service on multiple devices or need to update subscription settings, Bitdefender Antivirus Login seamless access is essential. This comprehensive walkthrough shows how to log in reliably, troubleshoot common difficulties, and maximize account features while maintaining secure control.

Why Account Access Matters

An online portal serves as the central command hub for activating protection, checking system health, adding devices, renewing subscriptions, and requesting help. Without the ability to sign in, critical actions like installing on a new machine or changing payment details can be blocked. Bitdefender Antivirus Login Access also ensures you can respond to security alerts quickly and maintain ongoing protection across hardware.

Account management is more than just installing software. It expands your ability to control features such as VPN access, parental controls, advanced threat protection, and more. Login Bitdefender Antivirus Logging in regularly ensures that everything runs smoothly and you can address potential issues as soon as they arise.

Preparing to Log In

Effective access starts with preparation. Begin by confirming that you can reach the login portal. Use a stable internet connection to avoid delays or interruptions. Bitdefender Antivirus Login Make sure you remember the email used during purchase or registration. Obtain your password or make sure you can reset it if necessary.

Ensure your device’s browser is fully updated. Compatible browsers like Chrome, Firefox, Edge, and Safari will load the portal properly. If credentials offer multi-factor protection, have your phone or authentication app available. Login Bitdefender Antivirus A pre-call checklist should include current system information, screen capture tools, and device details to help if adjustments or support become necessary.

Opening the Sign-In Interface

Launch your browser and manually enter the portal address in the address bar. This practice helps to avoid malicious redirection. Watch for the option labeled to indicate access or login. Bitdefender Antivirus Login Once selected, you’ll be presented with an entry form that typically requires email and password.

Carefully enter your account details, ensuring accurate spelling and proper capitalization. Passwords are case-sensitive, so double-check your entry. Once both fields are complete, proceed to submit the form. An authentication process will begin immediately.

If a double-factor code is required, a prompt will appear after successful login. Check your smartphone app or email for the code, then type it in promptly to gain full access.

Troubleshooting Login Issues

Sometimes entry fails due to incorrect credentials. Begin by verifying that each character is correct. Use the reset function if the password seems off. Login Bitdefender Antivirus Make sure you’re using the email associated with your account; many users forget which address they signed up with.

A confirmation link may have been missed after registration. Check your inbox and spam folder for verification messages. Resend the link if needed and Bitdefender Antivirus Login complete the account validation before trying again.

Browser caching can cause unexpected problems. Clear cookies and temporary files or switch to a private window. Then retry signing in.

Network settings or firewall restrictions may also block access. Bitdefender Antivirus Login Temporarily disconnect from VPNs, firewalls, or proxy services to test access. If the issue ends, you may need to configure those tools differently.

Server maintenance can render portals temporarily unavailable. If access attempts consistently fail, check for notifications about system status and wait until maintenance ends.

Resetting or Recovering Passwords

Password recovery is intuitive. Choose the link for recovery and enter your email address. You’ll receive an email with a temporary reset link or one-time code. Use it to create a new, strong password with uppercase and lowercase letters, numbers, and special characters.

After changing your password, return to the login screen and sign in again. Bitdefender Antivirus Login Your portal access should be restored without incident.

If you don’t get the recovery email, re-check the address for errors and check junk folders. Some servers may delay delivery by a few minutes. If no message arrives, customer support can assist further.

Enabling Biometric or Password Manager Sign-In

For added convenience, many people use password management tools. These securely store and autofill credentials when you revisit the portal. Login Bitdefender Antivirus Another option is enabling biometric login on supported platforms, which syncs device-level authentication with your portal.

Using these tools saves time and eliminates manual entry errors. Bitdefender Antivirus Login The portal typically includes settings to enable browser-based remember-me options. Ensure this feature is activated if you’re comfortable logging in from a private device.

Managing Connected Devices

After signing in, one of the first areas to explore is device management. You can review which systems currently run protection services. To install on a new device, Bitdefender Antivirus Login use the download link provided within the portal. Open the installer and sign in or enter your license when prompted.

When a device is retired or replaced, use the portal to remove it from the device list. Login Bitdefender Antivirus This frees up the license for another system. Keeping the device list up-to-date avoids reaching activation limits and helps you track where protection is installed.

Running Remote Scans and Updates

Once logged in, some portals allow you to initiate remote scans to help safeguard offline devices. You can request an update to version definitions or trigger a scan to verify health. Bitdefender Antivirus Login This is particularly helpful for users managing family computers or remote systems.

Access the device features page, select the specific device, and choose available options. You might be able to schedule scans or update subscriptions remotely. Login Bitdefender Antivirus It’s a powerful tool for ensuring all connected systems remain secure without physical access.

Managing Subscriptions and Billing Information

Subscription details are often visible from your account overview. Here you can review expiration dates, auto-renewal settings, and past transactions. You may also update billing information or choose different subscription tiers.

If auto-renewal is enabled, Bitdefender Antivirus Login you will be charged at the next billing cycle. Disabling it ensures no unintended charges. Upgrading adds coverage or features; downgrading may change protection levels. Always confirm the subscription plan and terms before applying changes.

Accessing Support and Logs

Many portals include support links or chat windows. If you encounter technical difficulties, logging into your account ensures the right context is available. Your system information and product version may be included automatically.

In addition, you may export diagnostic logs for troubleshooting. Bitdefender Antivirus Login These logs can highlight update failures, threat alerts, or performance concerns. When connected to support, exporting logs first accelerates problem identification and resolution.

Managing Profile Details and Security Settings

Your account likely includes sections where you can change your email, password, and security preferences. If your email changes, use the profile editor to save the new address. In many cases, a confirmation email will follow for verification.

If password strength drops or is compromised, Bitdefender Antivirus Login make sure to update it immediately. Once completed, log out and log back in to confirm the change took effect.

Some portals offer security alerts via email or push notification. Enable those for peace of mind.

Signing Out and Session Management

On shared or public devices, find the sign-out or log-out button—usually in the top navigation or user menu. Selecting logout will end your session and remove authenticated access. To clean up completely, clear browsing data or use a private window from the start.

Logging out correctly helps Bitdefender Antivirus Login maintain account safety and prevents unauthorized use, especially when using family or public devices.

Using Mobile Companion Apps

Applications for mobile devices allow you to use reported credentials to unlock features on Android or iOS. These apps often extend access to remote scanning, VPN controls, account alerts, and subscription settings.

Open the app on your phone, Bitdefender Antivirus Login enter your credentials exactly, and authorizations should follow. If access fails, ensure that your portal credentials are current and two-factor authentication is properly configured.

Using Alternative Browsers or Incognito Mode

When login issues persist, trying a different browser or using a private browsing window may help. Extensions or stored cookies sometimes block login interactions. Bitdefender Antivirus Login Incognito modes skip most of these effects, allowing you to sign in cleanly.

If this works, consider clearing site-specific cookies and restarting your usual browser.

Resolving Two-Factor Authentication Issues

Two-factor authentication adds security by requiring an additional verification step with a mobile device. If the authentication code doesn’t arrive in time, check your time settings or app configuration. Enter the code quickly, as many expire in under a minute.

If your authenticator app is unavailable, use the backup codes provided during setup. These are unique, one-time alternatives. Resetting 2FA may require contacting support, depending on your provider’s policy.

When the Portal Is Unreachable

If you can’t reach the login page, check your internet and any firewall settings that could be blocking access. Errors in DNS or IP blocking may affect access. Bitdefender Antivirus Login Visit your provider’s status page (on another device) to see if maintenance is underway.

When the portal is restored, avoid cached or expired pages by refreshing or clearing browser history.

Contacting Support If Needed

If access fails due to corrupted credentials or system issues, Login Bitdefender Antivirus support is your next step. Gather your account email, subscription details, system version, and any error messages. Preparedness helps the support team assist you quickly.

Ask if they can restore account access safely. Bitdefender Antivirus Login If email verification fails or the portal has been locked due to suspicious activity, they can confirm your identity and unlock your account.

Safety and Privacy Tips

Logging in from a secure network and device is essential. Enable two-factor authentication if available. Look for session logs in your profile, which shows recent sign-ins. If suspicious activity appears, immediately change your password and contact support.

If multiple incorrect attempts lock your account, Login Bitdefender Antivirus follow any provided wait time. Persistent lockouts may require support intervention.

Regular Account Maintenance

Keep security features active and update your password periodically. Make sure secondary email or phone details are current. Update billing information as needed. Log out of devices no longer in use, and clean up old entries to ensure credential hygiene.

Summary and Final Advice

Smooth account access requires planning and secure practices. Start by preparing credentials, updating browsers, enabling security options, and maintaining awareness of account activity. Bitdefender Antivirus Login Troubleshoot with recovery and use alternate browsers when appropriate. Most importantly, sign in confidently and manage devices and subscriptions with full control.

If you experience issues, take prompt action by collecting diagnostic information and reaching out thoughtfully to support. A well-managed account supports better security across your systems and offers peace of mind.

With this guide, Login Bitdefender Antivirus logging into and navigating the portal becomes second nature. As new devices get added or new features come out, you’ll be able to manage everything swiftly from one secure place. Just sign in, stay informed, and enjoy reliable protection across your digital life.

How Do I Sign in Bitdefender Antivirus Account? A Quick and Easy Guide

Ensuring seamless access to your cybersecurity tools can save you hours of frustration. When antivirus protection is in place, being able to log in to your account effortlessly helps you manage devices, Sign in Bitdefender Antivirus renew subscriptions, initiate scans, and access support. This comprehensive guide walks you through the full process of signing into your antivirus account, covering preparation, Sign in Bitdefender Antivirus troubleshooting, and best practices to ensure a smooth experience.

Why Account Access Matters

Your account portal serves as a control center for your device protection. It grants visibility into the number of devices you’ve connected, lets you monitor license status, Sign in Bitdefender Antivirus enables you to download installation files, and offers support avenues. Without proper access, you miss out on essential features such as real-time scans, VPN controls, parental settings, and automatic renewals. Bitdefender Sign in Having consistent access ensures you maintain effective protection.

Preparing to Log In

Before jumping into the sign-in process, it pays to review and prepare essential details:

  • Registered Email Address
    This is the primary identifier for login and account correspondence. Having access to that inbox is key.
  • Password
    The one you initially set when activating your license or account. If forgotten, plan to use the reset functionality.
  • Device with Internet Connection
    A stable connection ensures quick access to the online portal.
  • Supported Web Browser
    Use updated browsers such as Chrome, Firefox, Edge, or Safari for full compatibility.
  • Potential Verification Tools
    If two-factor authentication is enabled, keep your secondary device or authenticator app nearby.

How to Sign In

Begin by opening your preferred browser. Navigate to the homepage of the antivirus provider using a trusted method, such as typing the address manually. Avoid clicking unknown links to prevent accidental redirection.

At the top of the page, locate the option inviting you to sign in. Sign in Bitdefender Antivirus Click it to reveal the login screen, which generally includes fields for email and password. Enter your credentials carefully, paying attention to case sensitivity and possible typos.

Should you have two-factor authentication enabled, Bitdefender Sign in the system will detect this and prompt for an additional code. Retrieve the code from your authenticator application or via SMS. Enter the code and submit.

You should be taken into your user dashboard, Sign in Bitdefender Antivirus where you can see all authorized devices, active licenses, and updates. If access fails, continue to the troubleshooting section ahead.

Setting Up a New Account

If you’ve purchased the software but haven’t yet created a user account, follow this flow:

  • After choosing the sign-in option, locate and click the “sign-up” or “create account” prompt.
  • Provide your full name, email address, and create a strong password, typically involving uppercase letters, symbols, and numbers.
  • Submit the form and check your inbox for a verification email.
  • Open the email and confirm your registration by following the indicated steps.
  • Return to the portal and sign in with your new credentials.

This establishes account ownership and integrates your license automatically.

Recovering Lost Passwords

Forgetting a password is common. Bitdefender Sign in Use the “forgot password” link on the sign-in page to begin recovery:

  • Click the link and provide your registered email.
  • Watch for the password reset email and follow its instructions.
  • Create a new password that meets strength requirements.
  • Return to the login page using the new credentials.

If the reset email doesn’t appear, Sign in Bitdefender Antivirus be sure to check spam folders or ensure that the correct address was entered. If problems persist, review the troubleshooting section.

Optimizing for Smooth Access

  • Enable “Remember Me”
    Use this option if you’re on a trusted, personal device to skip entering credentials each time.
  • Use a Password Manager
    Tools like password managers help you store credentials securely and autofill them when needed.
  • Check Your Browser
    Disable auto-fill features that may insert incorrect or outdated credentials.
  • Verify Two-Factor Settings
    Ensure the authenticator app or mobile number listed is active and accessible.
  • Keep Your Software Updated
    Browser and antivirus updates can prevent compatibility issues during login.
  • Avoid Public Wi-Fi
    Whenever possible, use secure and private connections to sign in.

Resolving Sign-In Problems

If login fails, here are several areas to examine:

  1. Credential Accuracy
    Verify each entry for typos. If stuck, use password recovery.
  2. Email Mix-Up
    Cross-check the email you used at purchase with the one being entered.
  3. Inactive Accounts
    Newly created accounts may require email confirmation before access is granted.
  4. Password Outdated
    Regularly changing passwords may cause forgotten credentials. Reset if needed.
  5. Browser Issues
    Clear your browser cache and cookies or use incognito mode to test access.
  6. Firewall or VPN Conflicts
    Disconnect temporarily if you suspect network interference.
  7. Server Maintenance
    Check vendor announcements for scheduled downtime and wait until completion.

If login remains blocked, consider contacting support via phone or chat, prepared with error details and screenshots.

Managing Multiple Accounts

If you have multiple Sign in Bitdefender Antivirus subscriptions or devices under different credentials:

  • Use different browsers or profiles to keep sessions separate.
  • Use a password manager with smart profile switching.
  • Label each profile clearly to prevent mix-ups during login.

Understanding the Dashboard Once Signed In

Your account dashboard often includes:

  • A list of protected devices.
  • License activation and renewal information.
  • Download links for installation files.
  • Access to VPN, parental tools, and other add-ons.
  • Subscription management and billing history.
  • Support ticket submission features.

Explore the interface to become familiar with controls and settings.

Adding a New Device

To use your license on another system:

  • Sign in to your portal and access the devices section.
  • Click the control that helps you add a device.
  • Download the installer to that device.
  • Install and activate using your account details.
  • Confirm the device appears in your portal after installation.

Renewing or Upgrading Your License

When approaching license expiry:

  • Review your active licenses in the dashboard.
  • Select renew or upgrade to add time or advanced features.
  • Choose payment methods and confirm purchase.
  • See your license status update immediately post-transaction.

Changing Account Information

You can update your Bitdefender Sign in profile data including email, password, and contact details:

  • Sign in and locate account settings.
  • Access the personal information sections.
  • Enter new email or password and save changes.
  • Confirm via email if required.

Keeping your account current helps ensure communications reach you.

Signing Out Securely

On shared devices:

  • Locate the sign-out link, usually in the user menu.
  • Click it and wait to be redirected to the login page.
  • Clear any browser cache or saved credentials.

Properly logging out prevents unauthorized access.

Handling Security Warnings

If unusual login attempts are detected, Sign in Bitdefender Antivirus the system may lock your account or require additional verification. In such cases:

  • Follow prompts for password reset.
  • Review recent activity notices.
  • Enable two-factor authentication for added security.

Contact support if authentication steps fail or you suspect account theft.

Access from Mobile Devices

To sign in via mobile:

  • Install the antivirus companion app.
  • Use your registered email and password.
  • Authorize any required access permissions.
  • Optionally enable biometric authentication.

The mobile portal mirrors the desktop experience, giving you control on the go.

Recovering Forgotten Email

If you’ve forgotten which email was used:

  • Search old email folders for vendor receipts.
  • Try logging in with each email you may have used.
  • If none work, contact support with proof of purchase details.
  • They can help identify account ownership and assist with access.

Troubleshooting Unusual Error Messages

If you receive error codes or messages, these steps can help:

  • Write down the full message or code.
  • Search using trusted knowledge sources.
  • Clear browser data and retry.
  • Try a different browser or device.
  • If errors persist, prepare to communicate them clearly to support.

Best Practices for Logging In

  • Choose strong and unique passwords.
  • Enable two-factor authentication.
  • Use a password manager.
  • Keep your software and accounts updated.
  • Clear browser cache regularly.
  • Avoid public networks for logging in.
  • Store backup codes securely.
  • Review access logs periodically.

Bottom Line

Signing into your antivirus account should be a straightforward process. With careful preparation—such as having the right email and password, enabling enhanced security measures, Sign in Bitdefender Antivirus maintaining proper software updates, and following troubleshooting tips—you can minimize disruptions and focus on what matters: keeping your devices safe. By following this guide, you’ll master each step involved in account access, from initial setup to advanced management, ensuring reliable and continuous control over your cybersecurity protections. Sign in Bitdefender Antivirus If you encounter technical difficulties, be sure to collect information like error text and screenshots before reaching out for personalized support. Bitdefender Sign in With readiness and attention to detail, you’ll know exactly how to sign in and manage your protection effectively, no matter when or where.

How Do I “Sign in Bitdefender Account”? A Simple Guide

In today’s fast-evolving digital world, online security is not just a luxury—it’s a necessity. As more users rely on antivirus solutions to protect their digital lives, understanding how to access and manage those solutions becomes critical. Sign in Bitdefender One of the most prominent names in cybersecurity is Bitdefender. Known for its advanced protection features, intuitive interface, and robust support, Bitdefender Sign in offers comprehensive security for individuals and businesses alike.

This guide is designed to help users understand the process of accessing their online security management portal efficiently. Whether you’re a new user or returning after some time, this walkthrough ensures you can enter your dashboard without confusion or delay.

Understanding the Importance of Account Access

Before we delve into the actual process, Sign in Bitdefender it’s important to understand why accessing your control panel is vital. The account dashboard acts as a central hub where users can manage their devices, subscriptions, security settings, and product licenses. It’s the gateway to overseeing your entire protection framework, and logging in is the first step in taking full advantage of the suite’s capabilities.

Additionally, the account grants users access to features such as parental controls, VPN management, remote security scanning, and product updates. Bitdefender Sign in Without account access, users may miss crucial notifications, leave vulnerabilities unpatched, or be unable to manage connected devices.

Preparing for the Login Process

To ensure a smooth entry, a few basic things should be ready. These include:

  1. Stable Internet Connection: A working connection is necessary to open the portal and synchronize device data.
  2. Registered Email Address: The email you used during product registration or purchase is your primary identifier.
  3. Password: The password set during account creation is required to authenticate your identity.
  4. Browser: A modern, secure browser like Chrome, Firefox, Edge, or Safari should be used for optimal compatibility.

Step-by-Step Instructions for First-Time Users

If you’re accessing your security suite for the first time, Sign in Bitdefender the initial procedure differs slightly from that of returning users. Here’s what you need to do:

1. Visit the Main Website

Open your browser and enter the official URL manually into the address bar. Sign in Bitdefender Avoid clicking suspicious links or accessing the site from unverified sources.

2. Locate the Access Option

On the homepage, you will find an option labeled typically as “Sign In” or “My Account” at the top-right corner. Bitdefender Sign in Click on this to open the login panel.

3. Choose Registration (If New)

If you don’t already have an account, select the registration or sign-up option. You will be asked to enter your:

  • Full name
  • Email address
  • Password (with specific criteria like upper-case letters, numbers, and special characters)

After submission, you’ll receive a confirmation email to verify your credentials. Bitdefender Sign in Once verified, you can use these details to log in from any device.

For Returning Users

If you’ve previously accessed your security dashboard, here’s how to get back in:

Step 1: Navigate to the Sign-In Page

Using your browser, Sign in Bitdefender open the homepage and click on the sign-in link. This will redirect you to the login form.

Step 2: Enter Your Credentials

Input your registered email and password into the designated fields. Bitdefender Sign in Be careful to enter the information accurately—errors in spelling or case sensitivity can result in failed login attempts.

Step 3: Use Two-Factor Authentication (If Enabled)

If you have two-step authentication enabled, Sign in Bitdefender you will receive a code on your phone or email. Enter this code into the additional field to proceed.

Step 4: Access Your Dashboard

Once verified, you will be directed to your dashboard. Here, you can view:

  • Devices currently using protection
  • Active subscriptions and their expiry dates
  • Updates and security alerts
  • Additional services like VPN and parental control

Troubleshooting Login Problems

Even with the best intentions, users may face occasional hurdles. Sign in Bitdefender Let’s explore some common issues and how to resolve them:

Forgotten Password

If you forget your password, click on the “Forgot Password?” link located under the login form. You’ll receive an email with reset instructions. Bitdefender Sign in Follow the prompts to create a new password and regain access.

Incorrect Email

Make sure you’re using the email associated with your product registration. If you have multiple email accounts, check them to confirm which one was used.

Expired Password or Account Lock

Repeated failed login attempts may temporarily lock your account. Bitdefender Sign in Wait for a few minutes before trying again, or reset your password.

Browser Compatibility

Outdated or unsupported browsers may hinder access. Try clearing your browser’s cache or switching to a different browser.

Network Issues

Slow or unstable internet connections can interrupt the login process. Bitdefender Sign in Try resetting your modem or switching to a different network.

Tips for Seamless Access

To make future logins faster and more secure, consider the following tips:

  • Enable “Remember Me”: Many login pages have an option to remember your email for easier access next time.
  • Use a Password Manager: These tools store and autofill your login details, reducing the chances of typing errors.
  • Avoid Public Wi-Fi: Public connections may expose your credentials to risks. Always use trusted networks or a VPN.
  • Check for Phishing: Never log in via links in suspicious emails or pop-ups. Always access the site directly.

Managing Your Devices Post Login

Once inside, you gain complete control over how your devices are protected. Here’s what you can do:

Add or Remove Devices

You can add new systems by downloading the protection suite onto them. Bitdefender Sign in To remove, simply deauthorize from your dashboard.

Schedule Scans

Set regular security checks at your preferred times to ensure ongoing protection.

View Security Reports

Receive updates about threats, blocked websites, and other security events happening on your devices.

Renew or Upgrade

Manage billing, renew subscriptions, or upgrade your service tier as needed.

Mobile Access Considerations

Logging in via mobile devices is just as straightforward. Sign in Bitdefender The provider offers dedicated apps on both Android and iOS. Once downloaded:

  • Open the app
  • Enter your email and password
  • Use biometric authentication (fingerprint or face recognition) if supported
  • Navigate the same interface optimized for smaller screens

These apps also offer quick access to features like VPN, anti-theft tools, and parental controls.

Logging Out Securely

For shared or public devices, always remember to sign out after each session. Locate the logout option in the profile dropdown menu and click it before closing your browser. Bitdefender Sign in This ensures that unauthorized users don’t gain access to your private dashboard.

When to Contact Support

If all troubleshooting methods fail, the official customer support team can help. You can reach out via:

  • Email
  • Live Chat
  • Phone Support

Have your purchase ID or registered email ready to speed up the resolution process. Sign in Bitdefender Support is available 24/7 in most regions, offering technical help, billing support, and general inquiries.

Keeping Your Account Secure

Since this portal contains sensitive information about your device and personal data, take proactive steps to maintain its integrity:

  • Update Your Password Regularly
  • Enable Two-Factor Authentication
  • Monitor Login History (if available)
  • Avoid Sharing Login Credentials
  • Always Log Out After Use

Bitdefender Sign in

Conclusion

Navigating your cybersecurity platform doesn’t have to be a complicated process. Sign in Bitdefender By understanding the step-by-step procedures, keeping your credentials secure, and utilizing available tools, you can make managing your digital safety effortless. Whether you’re on a desktop or a mobile device, Bitdefender Sign in gaining access to your account is the key to unlocking a full suite of protective features that safeguard you in today’s digital age.

This guide aimed to simplify every aspect of the login journey—from first-time setup to advanced troubleshooting—ensuring you’re always in control of your digital environment. Sign in Bitdefender By following these recommendations, you’ll have a seamless and secure experience managing your protection from one centralized hub.

How Do I Bitdefender Antivirus Account Login? Quick and Easy Guide

In the modern age where online security threats are constantly evolving, having a robust antivirus solution is not just optional—it’s essential. Bitdefender stands out as one of the top-tier antivirus programs globally, Bitdefender Antivirus Login offering a comprehensive set of features aimed at protecting devices from malware, ransomware, phishing, and other cybersecurity threats. To access the full capabilities of this powerful software, users need to log in to their Bitdefender account. Understanding the login process thoroughly ensures a smooth experience and uninterrupted protection. This guide provides an in-depth walkthrough on how to log in to your Bitdefender antivirus account easily and securely.

Why Logging into Bitdefender is Important

Logging into your antivirus account is the first step to unlocking all of Bitdefender’s advanced features. It provides access to device management, scanning options, VPN services, subscription control, parental controls, and real-time threat detection. Bitdefender Antivirus Login Without logging in, many of these essential tools remain inaccessible. Furthermore, logging in helps synchronize protection across multiple devices, ensuring consistent and effective security coverage.

The Role of Bitdefender Central

Bitdefender Central is the command center where users manage their subscriptions, view notifications, install security solutions on other devices, and monitor security reports. When you talk about logging into Bitdefender, it primarily refers to accessing Bitdefender Central through a browser or the desktop/mobile app. It’s a centralized platform that connects your device to the broader Bitdefender ecosystem.

Preparing for the Login Process

Before logging into your account, you must ensure that you already have a registered Bitdefender Central account. If you’re a new user, this involves creating an account with your email and a strong password. Bitdefender Antivirus Login For returning users, having your login credentials at hand makes the process seamless. Additionally, a stable internet connection is necessary for the authentication to be successful.

Creating a Bitdefender Central Account

If you have not yet created an account, you’ll need to register first. This can be done through the website or directly from the application upon installation. You’ll be prompted to provide an email address and choose a password. It’s highly recommended to use a strong password containing upper- and lowercase letters, numbers, and symbols. Bitdefender Antivirus Login You might also be asked to verify your email address through a confirmation message. Once your account is active, you’re ready to log in.

Logging in Through a Web Browser

One of the most common ways to access your Bitdefender account is via a web browser. Navigate to the official Bitdefender Central portal. You’ll be presented with fields asking for your email and password. Once entered, clicking the login button will redirect you to your dashboard. This web-based login is particularly useful for managing multiple devices, renewing subscriptions, or accessing customer support.

Accessing Your Account on the Desktop Application

Once you have installed Bitdefender on your computer, the application will prompt you to log in the first time it launches. This screen is simple and intuitive, usually consisting of two fields for your email and password. Bitdefender Antivirus Login After entering your credentials, you’ll gain access to the full suite of features including antivirus scanning, firewall management, and ransomware protection.

Logging in from Mobile Devices

For users using Bitdefender Mobile Security on Android or iOS, the process is very similar. Open the app and you’ll be guided through the login screen. Once you provide your email and password, Bitdefender Antivirus Login the app connects to your Bitdefender Central account and activates your subscription. From here, you can run scans, check for threats, and manage various security settings specific to your mobile device.

Multi-Device Login Capability

Bitdefender allows users to access their account from multiple devices simultaneously, depending on the plan they’ve subscribed to. This is especially useful for families or businesses managing several devices. Bitdefender Antivirus Login Once logged in on each device, all are synchronized under one centralized account, and you can view and control them via your dashboard.

What Happens After You Log In

Upon successful login, you are taken to the Bitdefender Central dashboard. Here you’ll find an overview of your devices, current protection status, and notifications. From this interface, you can install security software on other devices, configure settings, activate additional features, and keep track of ongoing scans or security alerts. Bitdefender Antivirus Login This unified platform makes account and device management extremely convenient.

Two-Factor Authentication for Enhanced Security

To secure your Bitdefender account even further, consider enabling two-factor authentication. Once activated, you will be required to enter an additional security code sent to your mobile device or generated through an authenticator app after you input your regular credentials. Bitdefender Antivirus Login This extra layer of security helps prevent unauthorized access to your account, especially in case your password gets compromised.

Password Recovery Process

If you forget your login credentials, don’t worry. On the login screen, there is an option to reset your password. You’ll be asked to enter the email address associated with your account. A reset link will be sent to that email, allowing you to set a new password. Make sure the new password is strong and unique, and avoid using previously used passwords.

Managing Your Subscription Post-Login

Once logged in, you can view your subscription details including the type of plan you have, the number of devices covered, and the expiration date. You can also upgrade or renew your plan directly from the dashboard. This makes it easy to ensure that your antivirus protection is always active and up to date.

Enabling and Managing Parental Controls

One of Bitdefender’s standout features is its parental control system. Once logged in, you can set up profiles for your children, monitor their device usage, block inappropriate websites, and set screen time limits. Bitdefender Antivirus Login These settings can be managed entirely through the central dashboard, giving parents peace of mind while their children browse the internet.

Using Bitdefender VPN

Bitdefender also includes a virtual private network feature, which is accessible only when you are logged in. This VPN encrypts your internet traffic, hides your IP address, and allows safe browsing even on public Wi-Fi networks. Depending on your subscription plan, you may have access to unlimited or limited bandwidth. The VPN can be toggled directly from the application once you’re logged in.

Bitdefender Wallet and Password Manager

Another feature available upon login is Bitdefender Wallet or Password Manager. This tool securely stores your credentials for various websites and applications. You can access these credentials through your Bitdefender dashboard, making login processes across the web faster and more secure. It also helps protect against phishing by autofilling login details only on verified sites.

Troubleshooting Login Issues

If you encounter problems during login, start by ensuring that your email and password are entered correctly. Check for any typos or unintentional use of caps lock. Next, make sure your internet connection is stable. Bitdefender Antivirus Login If you still can’t log in, try resetting your password or reinstalling the application. Firewall or antivirus conflicts on your system may also prevent the app from connecting to the login servers. Disabling other conflicting software temporarily might help resolve the issue.

Keeping Your Account Secure

To maintain the security of your Bitdefender account, do not share your login credentials with others. Always log out of your account on public or shared computers. Regularly update your password and keep your recovery email current. Enabling two-factor authentication significantly boosts your account security.

Signing Out from Devices

When finished using your Bitdefender account on a device, it’s good practice to log out—especially if the device is shared with others. This can usually be done from the settings menu in the application or through the central dashboard. Signing out ensures that unauthorized users cannot make changes or view sensitive security information.

Notifications and Alerts Post-Login

Once logged in, Bitdefender provides real-time alerts and notifications on malware detections, scan results, subscription renewals, and software updates. These alerts keep you informed and allow for quick responses to potential threats. Bitdefender Antivirus Login You can customize these notifications to your preference from the dashboard settings.

Device Management Made Easy

From the Bitdefender Central dashboard, you can add, remove, or rename devices. This is particularly useful for families with multiple devices under one subscription. Each device’s protection status is displayed in real-time, and you can remotely trigger scans or apply updates. You also have the option to deauthorize old devices that you no longer use.

Automatic Login and Security Considerations

Some users may opt to save their login credentials for automatic sign-in. While this is convenient, it’s essential to ensure that the device itself is secure. Use device-level passwords or biometric locks to protect unauthorized access. Bitdefender Antivirus Login On public or shared computers, never enable auto-login, and always remember to log out after use.

Regular Updates and Login Smoothness

Bitdefender frequently updates its software to patch vulnerabilities and enhance user experience. Keeping your application up to date ensures that the login process remains smooth and secure. Bitdefender Antivirus Login Outdated versions may face compatibility issues, causing login delays or authentication errors. Enabling automatic updates is a great way to stay current without manual intervention.

Integrating with Other Security Tools

For users who rely on additional security tools, Bitdefender integrates well with system firewalls and operating system security settings. Logging in ensures that the antivirus communicates efficiently with other protective layers, offering seamless security coordination. When your account is logged in and active, these integrations help in delivering real-time, multilayered protection.

Conclusion: A Smooth Path to Comprehensive Protection Understanding how to log into your Bitdefender antivirus account is foundational to maintaining robust digital protection. From securing your credentials to managing your devices and subscriptions, the login process is more than just an entry point—it’s a gateway to an ecosystem of advanced security features. Bitdefender Antivirus Login By following the steps and practices outlined in this guide, users can confidently navigate the login process, ensuring their devices remain shielded from the ever-present dangers of the online world. Whether on desktop, mobile, or browser, the process is intuitive, fast, and designed with user convenience in mind. Mastering this simple but crucial step ensures that your antivirus software works to its fullest potential, safeguarding everything that matters most in your digital life.

How Do I “Login Bitdefender Antivirus Account”? A Simple Guide

In the ever-evolving digital world, cybersecurity is no longer a luxury—it is an absolute necessity. One of the most reliable antivirus solutions on the market is Bitdefender. Known for its exceptional protection capabilities, Login Bitdefender Antivirus real-time threat detection, and intuitive interface, Bitdefender remains a top choice for both home and business users. However, to utilize all its advanced features, users must first log in to their Bitdefender Antivirus account. Understanding how to perform this task efficiently is essential for maximizing security. This article offers a comprehensive and user-friendly guide to address the query: How Do I “Login Bitdefender Antivirus Account”? A Simple Guide

Understanding the Importance of Logging into Your Bitdefender Antivirus Account

Logging into your Bitdefender account is essential for accessing the full range of services and settings. It allows you to manage your subscription, monitor the security status of all your devices, Login Bitdefender Antivirus receive product updates, enable anti-theft protection, activate parental controls, and much more. It also ensures that your devices stay protected and your personal data remains secure. Bitdefender Antivirus Login Without logging in, your control over the antivirus functionalities would be minimal, limiting your ability to adjust protection levels or review security reports.

Knowing What You Need Before Login

Before attempting to log in, ensure that you already have a Bitdefender Central account. Bitdefender Central is the platform from which all Bitdefender services are managed. You’ll need your email address and the password you used during account creation. Login Bitdefender Antivirus It’s also advisable to have a stable internet connection, as login processes rely on online authentication.

Creating a Bitdefender Central Account

If you’re new to Bitdefender and haven’t created an account yet, that’s the first step. The account creation process involves entering your email address, choosing a secure password, and verifying your email. Login Bitdefender Antivirus Once your account is created, it serves as the gateway to all of Bitdefender’s security tools and services. You can then proceed to log in from any device that supports the software.

Accessing the Login Interface on Desktop

To login from a computer, begin by opening the Bitdefender application that you have installed. Login Bitdefender Antivirus Once launched, the interface will present you with a prompt to sign in. If the prompt does not appear immediately, navigate to the ‘Account’ or ‘Sign In’ section from the dashboard or settings menu. Bitdefender Antivirus Login Clicking on this will take you to the login screen where you will be required to enter your registered email and password.

Entering Credentials Correctly

When the login screen appears, enter your credentials carefully. Double-check that the email and password are typed correctly. Pay attention to capital letters, special characters, and spaces. Login Bitdefender Antivirus Some systems are case-sensitive and can reject incorrect entries. You might also encounter a ‘show password’ option to help avoid typing errors. Only use this feature in private, secure environments to avoid compromising your credentials.

Using Login on Mobile Devices

For users accessing Bitdefender on a smartphone or tablet, the process is nearly identical. Open the Bitdefender Mobile Security app, navigate to the login area, and input your credentials. Bitdefender Antivirus Login Mobile apps are optimized for small screens and usually offer a simplified, seamless experience. Once logged in, you can manage your device, scan for threats, and configure protection settings just like on a desktop.

Remember Me and Auto-Login Features

Bitdefender allows you to stay signed in with the ‘Remember Me’ or ‘Keep Me Logged In’ options. These features are convenient for frequent users as they eliminate the need to log in each time the app is launched. Login Bitdefender Antivirus However, enabling this on public or shared devices is not recommended. Always ensure that your session is protected with a device lock or password when using this feature.

Handling Forgotten Passwords and Login Issues

If you have forgotten your password, click the ‘Forgot Password’ option available on the login screen. Bitdefender Antivirus Login Bitdefender will guide you through the process of resetting your password via your registered email. Ensure that you have access to this email account to receive the reset instructions. Once reset, you can log in using the new credentials. Login Bitdefender Antivirus If login issues persist, make sure your internet connection is stable and the app is updated to the latest version.

Logging into Bitdefender Central via Web Browser

Apart from logging in through the Bitdefender application, you can also access your account via the Bitdefender Central website. Open a browser, navigate to the site, and enter your email and password in the login fields. Bitdefender Antivirus Login This interface is useful for users managing multiple devices or family accounts. Through Bitdefender Central, Login Bitdefender Antivirus you can install antivirus software on new devices, view security reports, renew subscriptions, and more.

Two-Factor Authentication for Enhanced Security

Bitdefender offers two-factor authentication to bolster account security. This feature requires users to verify their identity using a code sent to their mobile device or generated by an authentication app. Login Bitdefender Antivirus After entering your regular login credentials, the system will prompt for this code. Enabling two-factor authentication is highly recommended as it provides an extra layer of protection against unauthorized access.

Account Dashboard Overview After Login

Once logged in, you are directed to the account dashboard. Bitdefender Antivirus Login This central hub displays your subscription status, protected devices, available features, and security alerts. From here, you can also initiate scans, install protection on new devices, activate special features like VPN, and update account settings. The dashboard provides a clear overview of your overall security posture and simplifies management tasks.

Security Features Accessible Post-Login

Logging into your Bitdefender account gives you access to a wide array of tools designed to protect your digital life. These include real-time protection, ransomware remediation, Login Bitdefender Antivirus network threat prevention, vulnerability assessment, firewall management, and web attack prevention. Without logging in, many of these features remain inaccessible or operate in a limited mode.

Subscription and License Management

Another vital function available post-login is subscription management. You can view your current plan, check remaining days, upgrade your service, or redeem activation codes. Bitdefender Antivirus Login Bitdefender allows license sharing, which is especially helpful for family plans. All these features are accessible only after a successful login to the account.

Setting Up Parental Controls and Anti-Theft Tools

Bitdefender offers advanced tools like parental controls and anti-theft features. These require you to be logged in for proper configuration and management. With parental controls, you can monitor your child’s device usage and filter inappropriate content. Login Bitdefender Antivirus Anti-theft tools enable you to locate, lock, or wipe your device remotely if it’s lost or stolen.

Logging In from Multiple Devices

Bitdefender supports multiple device logins under one account, depending on your subscription type. Whether you’re using a laptop, desktop, tablet, or smartphone, Bitdefender Antivirus Login logging in allows centralized control. This capability is particularly useful for families or small businesses where multiple devices need comprehensive security oversight.

Signing Out of Your Bitdefender Account

Logging out is essential when accessing your account from shared or public devices. Within the application or browser dashboard, navigate to account settings and select the logout option. This ensures that your account remains secure and prevents unauthorized changes or misuse.

Maintaining Account Security

After logging in, it’s critical to ensure the ongoing security of your account. Login Bitdefender Antivirus Use a strong, unique password that’s not reused across other platforms. Regularly update your login credentials and enable two-factor authentication. Avoid logging in from unsecured or public networks without a trusted VPN.

Understanding the Role of Updates in Login Process

Occasionally, login issues may stem from outdated software. Bitdefender frequently releases updates to improve functionality and security. Ensure that both your operating system and Bitdefender application are up to date. Bitdefender Antivirus Login These updates often include bug fixes that might resolve login glitches and improve the overall user experience.

Using Password Managers for Secure Login

To manage multiple passwords securely, consider using a password manager. Bitdefender offers its own password manager, which can store your credentials in an encrypted format. Login Bitdefender Antivirus This ensures that your login process is quick, secure, and hassle-free while protecting your data from phishing attempts or memory lapses.

Dealing with Login Failures After Updates or System Changes

Sometimes system changes or major updates can reset app configurations or cause login issues. In such cases, try reinstalling the application. Make sure to uninstall the existing version completely before a fresh install. Log in again using your credentials, and your account will restore previous settings and preferences.

Accessing Help and Support for Login Issues

If login issues remain unresolved, Bitdefender’s customer support is available to assist. You can access troubleshooting guides, community forums, or submit a ticket to the support team. Bitdefender Antivirus Login Most problems are addressed within a short period, and detailed step-by-step instructions are available for more complex issues.

Optimizing Login Experience for Business Users

For businesses using Bitdefender GravityZone or other enterprise solutions, login management is handled differently. Admins have centralized control and can manage multiple users from a single portal. Login Bitdefender Antivirus Understanding the specific login requirements of your business solution ensures streamlined management and improved security.

Conclusion: How Do I “Login Bitdefender Antivirus Account”? A Simple Guide Successfully logging into your Bitdefender Antivirus account is the cornerstone of utilizing the powerful suite of tools this software provides. Whether you’re a new user or an experienced subscriber, a smooth login experience is critical to maintaining high-level cybersecurity. Bitdefender Antivirus Login From creating an account and entering credentials, to using two-factor authentication and managing multiple devices, every step plays a role in ensuring that your digital environment remains protected. This guide was designed to offer clarity and actionable steps for anyone wondering, How Do I “Login Bitdefender Antivirus Account”? A Simple Guide that equips you with the knowledge to secure your devices confidently and efficiently.

How Do I “Sign in Windscribe Account”? A Simple Guide

In today’s digital landscape, virtual private networks (VPNs) have become essential for maintaining online privacy and security. Among the most widely used VPN services is Windscribe, Sign in Windscribe known for its reliability, user-friendly interface, and solid privacy policies. For both beginners and seasoned users, signing in to a Windscribe account is the very first step toward accessing these secure services. Sign in Windscribe Understanding how to properly access your account ensures a seamless experience in utilizing the full features of the VPN. In this guide, we’ll walk you through everything you need to know about the process in an easy-to-understand manner.

Understanding the Importance of Signing into Your Windscribe Account

Before diving into the step-by-step procedure, it’s important to understand why signing in is crucial. When you sign into your Windscribe account, you gain access to advanced features that are restricted for non-registered users. Sign in Windscribe This includes your subscription details, bandwidth usage, server locations, account settings, and the ability to use Windscribe on multiple devices. Signing in also ensures that your VPN Windscribe Sign in configurations and preferences are saved and applied consistently across all platforms.

Choosing the Right Platform to Sign In

Windscribe offers its services across a variety of platforms including Windows, macOS, Linux, Android, iOS, as well as browser extensions for Chrome, Firefox, and Opera. Sign in Windscribe The sign-in process is mostly uniform across these platforms, but there are slight interface differences depending on the device or operating system you’re using. Whether you prefer to access your VPN via desktop software or mobile app, Windscribe ensures that the procedure remains user-friendly and efficient.

Creating Your Windscribe Account First

To sign in, Windscribe Sign in you need to have an active Windscribe account. Creating an account is free, although premium features are available through a paid subscription. During the account creation process, Sign in Windscribe you will need to choose a username, provide a valid email address (optional but recommended for password recovery), and set a strong password. Once the account is created, you’re ready to proceed with the login process on any compatible device.

Launching the Windscribe Application

Once you have installed the Windscribe application or extension on your chosen platform, Sign in Windscribe locate the icon and open the application. This initial launch screen will typically prompt you to either sign in or sign up. Since the focus here is on signing in, you’ll need to click on the sign-in option. The login interface is straightforward, consisting of fields for your username and password.

Inputting Your Credentials Securely

When prompted, enter your registered Windscribe username and password. If you opted to use an email address during registration, you can also use that instead of the username. Sign in Windscribe Ensure that the password is typed correctly, taking care of uppercase and lowercase characters. Most applications offer a ‘show password’ icon to make typing easier and help avoid typos. Make sure to do this only in a secure environment where others cannot see your screen.

Enabling ‘Remember Me’ for Faster Access

Windscribe provides an option to remember your credentials so you don’t have to input them every time. This is especially helpful for frequent users. Sign in Windscribe However, be cautious about using this feature on shared or public computers, as it may compromise your account’s security. If you are on your personal device, enabling this can significantly speed up the sign-in process.

Dealing with Common Login Errors

Sometimes, users encounter issues during the sign-in process. One common error is an incorrect username or password. If this happens, double-check the spelling and try again. Sign in Windscribe If you’ve forgotten your password, use the “forgot password” option to reset it through your registered email. Other issues might be related to poor internet connectivity or server outages. Ensuring that your internet connection is stable and that you’re using the latest version of the Windscribe application can help mitigate these problems.

Signing in Through the Browser Extension

If you prefer to use the Windscribe browser extension rather than the standalone app, the login steps remain fairly similar. Click the Windscribe icon in your browser toolbar to open the extension, Sign in Windscribe then enter your login credentials. Once signed in, you’ll be able to enable the VPN directly from your browser and choose server locations for a customized experience.

Accessing Your Account Dashboard Online

In addition to the application and browser extension, you can also sign in to your Windscribe account via its official website. This gives you access to your account dashboard where you can manage subscriptions, Sign in Windscribe generate configuration files for manual setups, view your data usage, and change your password. Signing into the web dashboard is particularly helpful for troubleshooting or updating billing details.

Using Two-Factor Authentication for Enhanced Security

Windscribe offers the option to enable two-factor authentication (2FA), adding an extra layer of security to your account. After entering your username and password, Sign in Windscribe you will also be prompted to enter a code sent to your email or generated by an authenticator app. Setting up 2FA is a smart move for users who want to ensure that their account cannot be accessed even if the password is compromised.

Troubleshooting and Support Resources

If you experience persistent login issues despite entering correct credentials, Windscribe provides a variety of support resources. These include an extensive knowledge base, community forums, and a ticket submission system. Sign in Windscribe While Windscribe does not offer live chat support, their response time through tickets is typically reasonable. They also offer troubleshooting guides specifically for login problems, which can be found on their website.

Understanding Account Tiers and Their Impact on Login

Windscribe offers both free and paid (Pro) account tiers. While the sign-in process is identical for both, Pro users have access to more server locations, faster speeds, and unlimited bandwidth. Sign in Windscribe If you’re using a free account and encountering limitations, consider upgrading your plan to get the most out of your Windscribe experience. Signing in with your upgraded credentials will unlock these features automatically.

Managing Devices Linked to Your Account

When you sign in to Windscribe from multiple devices, each device gets linked to your account. You can manage these devices through your account dashboard. This is useful if you’ve hit the limit on allowed simultaneous connections or if you want to deauthorize a device you no longer use. Keeping track of active sessions helps maintain account security and efficient usage.

Using Windscribe on Public or Shared Devices

If you must use Windscribe on a shared or public device, avoid saving your login credentials and be sure to log out after your session. Additionally, Sign in Windscribe clear the browser cache and cookies to ensure that no residual data remains. While VPNs are built to protect your online privacy, practicing basic account hygiene is just as important.

Keeping Your Credentials Safe

To avoid being locked out of your Windscribe account, store your credentials in a secure password manager. This allows you to retrieve your information quickly when needed and protects it from unauthorized access. Windscribe Sign in Refrain from sharing your login credentials, even with trusted individuals, as this could violate Windscribe’s terms of service and jeopardize your account.

Updating Your Login Information

If you suspect that your account credentials have been compromised, log into your account dashboard immediately and update your password. Windscribe also allows you to change your registered email address, which is especially useful if you lose access to the original email used during registration. Always choose strong, unique passwords that are difficult to guess.

The Role of Updates and Compatibility

Make sure your Windscribe application is up to date. Windscribe Sign in Older versions of the app may contain bugs that interfere with the login process. Frequent updates ensure compatibility with new operating systems and include important security patches. Enable automatic updates if possible to keep your software current without manual intervention.

Logging Out and Switching Accounts

When you’re finished using Windscribe or need to switch accounts, it’s important to log out properly. This ensures that your session is closed and prevents unauthorized access. Windscribe Sign in To log out, go to the settings menu and click on the logout option. You can then sign in with another account if necessary. This is especially useful for users who manage multiple Windscribe accounts.

Sign-In Confirmation Emails and Alerts

To enhance security, Windscribe may send sign-in confirmation emails when your account is accessed from a new device or IP address. These alerts are meant to protect you and should not be ignored. Windscribe Sign in If you receive a notification about an unfamiliar sign-in, take immediate action by changing your password and reviewing your account activity.

Why a Seamless Sign-In Experience Matters

A smooth sign-in process is vital for user satisfaction. Windscribe excels in creating a streamlined experience that enables users to access their VPN service without technical hurdles. Windscribe Sign in By following the recommended guidelines and keeping your account details secure, you can ensure uninterrupted access to Windscribe’s privacy-protecting features.

Conclusion: How Do I “Sign in Windscribe Account”? A Simple Guide

Mastering the Windscribe login process is a fundamental skill for anyone looking to safeguard their digital privacy. From understanding the importance of secure credentials to troubleshooting potential errors, every step plays a crucial role in your overall VPN experience. Whether you’re using a desktop, Windscribe Sign in mobile app, or browser extension, Windscribe ensures that signing in remains a straightforward and efficient task. By adhering to best practices such as enabling two-factor authentication, managing devices, and keeping your application up to date, you not only improve your security but also make the most of what Windscribe has to offer. So, if you’ve been wondering, how do I “Sign in Windscribe Account”? A Simple Guide like this equips you with all the knowledge you need to sign in smoothly and securely every time.

How Do I “Login Windscribe Account”? A Simple Guide

Logging into your Windscribe account should be a smooth and simple process, especially when guided properly. Whether you’re a new user trying to sign in for the first time or a returning user facing difficulties accessing your account, Login Windscribe having a step-by-step guide can make all the difference. In this comprehensive article, we will walk you through everything you need to know about the process, what you need beforehand, common errors to avoid, and tips to stay secure. This guide is tailored to provide a thorough answer to the question: How Do I “Login Windscribe Account”? A Simple Guide.

Understanding Windscribe and Its Importance

Before diving into the login process, it’s helpful to understand what Windscribe is and why your account access is crucial. Windscribe is a virtual private network (VPN) service that helps users protect their privacy online. Login Windscribe It provides secure, encrypted connections that shield your data from hackers, trackers, and even government surveillance.

Having a Windscribe account enables you to use the service across multiple platforms, including desktop computers, smartphones, tablets, and browsers. Your login credentials not only help you connect to servers around the world but also manage your subscription, track data usage, and configure advanced settings.

Preparing to Login: What You Need

To avoid complications during the login process, Login Windscribe ensure the following items are readily available:

  • A valid Windscribe username or registered email address
  • The correct password for your Windscribe account
  • A device with internet access
  • Optional: Windscribe desktop or mobile app installed, or access to the official website via browser

If you have recently created an account, Login Windscribe make sure you have verified your email address through the confirmation email Windscribe sends during registration. An unverified account may lead to login restrictions or limited functionality.

Login via the Windscribe Website

One of the most common ways to access your Login Windscribe Windscribe account is through their official website. This method is ideal if you want to manage account settings, check your bandwidth usage, or upgrade your subscription.

Here’s how you can access it via the website interface:

  • Open your preferred web browser
  • Go to the official Windscribe website homepage
  • Locate the “Login” button, usually found at the top right corner of the page
  • Click on it, which will lead you to the login portal
  • Enter your registered email address or username
  • Type in your password carefully
  • Hit the “Login” button to proceed

Upon successful login, you will be redirected to your account dashboard, Login Windscribe where you can manage subscriptions, change server preferences, or check remaining bandwidth.

Login via Windscribe Desktop App

Windscribe’s desktop app is available for various operating systems such as Windows, macOS, and Linux. Logging in via the app is typically required before connecting to a secure server.

To access your Windscribe account through the desktop app, follow these steps:

  • Open the installed Windscribe application
  • A login screen should appear by default
  • Enter your credentials in the username/email and password fields
  • Click the “Login” or “Sign In” button
  • The app will then authenticate and redirect you to the main interface

Once logged in, you can easily connect to your desired server location, Login Windscribe activate firewall settings, or enable split tunneling depending on your operating system’s compatibility.

Login via Windscribe Mobile App

The mobile application is available for both Android and iOS devices. Logging in via the mobile app enables you to stay protected while using public Wi-Fi networks or mobile data.

To log in via your smartphone or tablet:

  • Open the Windscribe app
  • Enter your email/username and password
  • Tap the login button
  • After authentication, the app dashboard will appear

Here, you can choose a server, turn on the VPN connection, Login Windscribe and access usage statistics. It’s an efficient and secure way to use the service while on the move.

Login via Browser Extension

Windscribe also offers browser extensions for Chrome, Firefox, and Edge. The browser extension is lightweight and gives quick access to VPN services without opening the app.

Steps to login using the browser extension:

  • Click on the Windscribe extension icon in your browser
  • The extension interface will prompt you to login
  • Input your credentials and click the login button
  • The icon will change appearance, indicating a successful login

You can now connect to different virtual locations and block trackers directly from the extension.

Common Login Errors and Their Fixes

Sometimes, users encounter issues while trying to login to their Windscribe account. Login Windscribe Knowing how to identify and resolve these problems is important for a seamless experience.

Incorrect Password or Username
The most frequent error is entering incorrect login credentials. Double-check for spelling errors, ensure Caps Lock is off, and make sure the keyboard layout is correct.

Account Not Verified
If you haven’t confirmed your email during registration, you might not be able to log in. Locate the verification email from Windscribe and follow the link to verify your account.

Network Issues
Ensure your device is connected to the internet. Slow or unstable networks can interrupt the login process.

App Not Updated
Outdated versions of the app or browser extension may cause login failures. Update the software to the latest version.

Server Errors
Occasionally, Windscribe’s servers may be down for maintenance. Wait for a while and try logging in later.

What to Do If You Forgot Your Password

Forgetting your password can be frustrating, Login Windscribe but recovering access to your Windscribe account is straightforward.

To reset your password:

  • Go to the Windscribe login page on the website
  • Click the “Forgot Password?” link
  • Enter your registered email address
  • Check your inbox for a password reset link
  • Follow the link and create a new password

Make sure your new password is strong, unique, and stored securely to prevent future access issues.

Staying Secure While Logging In

Logging into your Windscribe account involves sensitive data exchange. Login Windscribe Always practice safety measures to ensure your credentials are not compromised.

Use a Strong Password
Choose a password that includes upper and lower-case letters, numbers, and special characters.

Enable Two-Factor Authentication (If Available)
While not mandatory, two-factor authentication adds an extra layer of security.

Avoid Public Wi-Fi When Logging In
Unsecured networks are hotspots for cybercriminals. Login Windscribe If you must log in using public Wi-Fi, connect to Windscribe’s VPN first.

Keep Your Device Secure
Ensure that your device has updated antivirus software and a secure operating system.

Managing Your Windscribe Account After Login

Once you successfully log in, there are several account management features available:

  • Check bandwidth usage: Stay within your free plan’s limits or monitor premium usage.
  • Upgrade your plan: Move from free to Pro for enhanced features.
  • Change login credentials: Update your password or email from the settings.
  • Access support: Contact Windscribe’s support team if you face issues.
  • Download configuration files: Useful for manual VPN setups on routers or unsupported devices.

Efficient account management enhances your overall Windscribe experience.

Logging Out of Your Windscribe Account

Sometimes, logging out is necessary, especially when using a shared or public device.

To log out from the website:

  • Navigate to your account dashboard
  • Click on your username or profile icon
  • Select the “Log Out” option

To log out from the app:

  • Open the Windscribe app
  • Go to settings or menu
  • Click on “Log Out” or “Sign Out”

Doing so prevents unauthorized access and maintains your privacy.

Why Logging In Matters

Login isn’t just about accessing an account. Login Windscribe It enables users to experience the full power of the Windscribe VPN. Logging in gives you the ability to:

  • Use secure internet browsing
  • Access geo-blocked content
  • Prevent data leaks and surveillance
  • Manage subscription details
  • Customize VPN settings according to your needs

So, the next time you ask yourself, How Do I “Login Windscribe Account”? A Simple Guide, remember that this process is the key to unlocking robust online privacy and security.

Conclusion

Successfully logging into your Windscribe account is the first step to ensuring a private, secure, and unrestricted internet experience. From accessing your account via the website, app, or browser extension, Login Windscribe to troubleshooting login issues and securing your data—this guide has covered it all.

By following the practices outlined in this article, you can confidently say you now understand the answer to the question: How Do I “Login Windscribe Account”? A Simple Guide.

SonicWall VPN Download for Windows, macOS, and Mobile

In today’s increasingly connected world, remote access to enterprise networks has become a fundamental requirement. Whether working from home, traveling, SonicWall VPN Download or managing distributed teams, the need for secure access to internal systems is paramount. SonicWall provides a trusted solution through its Virtual Private Network (VPN) offerings. Designed to support multiple platforms, SonicWall VPN ensures that users on Windows, macOS, SonicWall VPN Download and mobile devices can connect safely and efficiently to corporate environments.

This comprehensive guide walks you through everything you need to know about downloading and using SonicWall VPN across different platforms. From system requirements to step-by-step installation instructions, it covers all essential aspects to ensure a smooth and secure user experience.

Understanding SonicWall VPN

SonicWall VPN is a set of client applications and technologies that allow users to establish secure tunnels to SonicWall firewall appliances. SonicWall VPN Download These tunnels encrypt communication, making it safe for users to access private networks over public internet connections. SonicWall VPN solutions are built around various technologies such as SSL (Secure Sockets Layer) and IPsec (Internet Protocol Security).

SonicWall VPN Client Options:

  1. Global VPN Client (GVC) – Primarily for Windows and supports IPsec-based VPNs.
  2. NetExtender – A lightweight SSL VPN client for Windows, macOS, and Linux.
  3. Mobile Connect – A VPN client app for mobile devices including iOS and Android.

System Requirements

Before you begin the download and installation process, SonicWall VPN Download it’s important to ensure your device meets the necessary specifications.

For Windows (Global VPN Client & NetExtender):

  • Windows 7/8/10/11 (32-bit or 64-bit)
  • At least 512 MB RAM (1 GB or more recommended)
  • Minimum 100 MB free disk space
  • Administrator privileges for installation

For macOS (NetExtender & Mobile Connect):

  • macOS 10.12 or later
  • Admin access for installing apps
  • Internet access for downloading packages

For Mobile Devices (Mobile Connect):

  • iOS version 11.0 or later
  • Android version 6.0 or higher
  • Stable internet connection

Preparation Before Download

Before downloading the VPN client for any device, a few preparation steps are essential:

  • Collect VPN credentials – These include server address, username, password, and domain/group if needed.
  • Verify VPN policy setup – Ensure the SonicWall device is correctly configured by your network administrator.
  • Check user privileges – Confirm your user account has permission to access the VPN service.

SonicWall VPN Download for Windows

Option 1: Global VPN Client (GVC)

This client is ideal for businesses using IPsec VPNs. It provides full-featured tunneling and integration with the Windows networking stack.

Steps to Download and Install:

  1. Navigate to the SonicWall support website.
  2. Select the “Downloads” section.
  3. Choose the appropriate version of Global VPN Client based on your Windows version.
  4. Click to download and save the executable file.
  5. Double-click the installer to begin.
  6. Follow the on-screen instructions.
  7. Reboot your computer if prompted.

Configuration:

  • Launch the client.
  • Click on “New Connection.”
  • Enter a name, IP address of the SonicWall device, and select authentication method.
  • Save and connect.

Option 2: NetExtender for Windows

NetExtender is used when SSL VPN policies are enabled. It’s easy to deploy and provides automatic IP address and DNS settings.

Download Steps:

  1. Visit the SonicWall official portal.
  2. Navigate to the NetExtender section.
  3. Select Windows as the platform.
  4. Download the .exe setup file.
  5. Run the installer and follow instructions.

Usage:

  • Open NetExtender from the Start Menu.
  • Enter your credentials and domain.
  • Click “Connect.”

SonicWall VPN Download for macOS

macOS users can choose between NetExtender and Mobile Connect. Each has its benefits depending on security policy and ease of use.

Option 1: NetExtender for macOS

Download & Install:

  1. Go to the SonicWall support site.
  2. Find NetExtender in the download list.
  3. Choose macOS as the platform.
  4. Download the .dmg file.
  5. Open the file and drag NetExtender to the Applications folder.

Connect:

  • Launch NetExtender.
  • Enter VPN server address, username, password, and domain.
  • Click “Connect.”

Option 2: Mobile Connect for macOS

Installation via Mac App Store:

  1. Open the Mac App Store.
  2. Search for “SonicWall Mobile Connect.”
  3. Click “Get” then “Install.”

Setup:

  • Open the app.
  • Click “Add Connection.”
  • Enter the required server and login details.
  • Save and connect.

SonicWall VPN Download for Mobile

Mobile access is crucial for professionals on the go. SonicWall Mobile Connect provides a user-friendly interface and strong encryption.

For iOS Devices

Installation:

  1. Open the App Store.
  2. Search for “SonicWall Mobile Connect.”
  3. Tap “Download” and wait for installation.

Setup:

  • Open the app.
  • Add a new VPN connection.
  • Input server IP, username, password, and domain.
  • Tap “Connect.”

For Android Devices

Installation:

  1. Open Google Play Store.
  2. Search “SonicWall Mobile Connect.”
  3. Install the app.

Setup:

  • Launch the app.
  • Add VPN connection with proper credentials.
  • Tap “Connect.”

Troubleshooting Tips

Even with proper setup, issues can arise. Here are common problems and how to fix them:

Connection Failure

  • Verify network connectivity.
  • Recheck the server address and port number.
  • Disable conflicting software like other VPN clients or firewalls.

Authentication Errors

  • Confirm correct username and password.
  • Ensure that the user has VPN permissions.
  • Check for expired passwords.

Installation Problems

  • Run installers as Administrator.
  • Clear any remnants of previous VPN clients.
  • Disable antivirus temporarily during install.

VPN Disconnects Randomly

  • Use a stable internet connection.
  • Adjust the client timeout settings.
  • Consult your administrator about load balancing or failover issues.

Best Practices for VPN Usage

Security and stability go hand-in-hand with SonicWall VPN Download best practices. Consider these recommendations:

  • Regularly update the VPN client.
  • Use strong, complex passwords.
  • Enable Two-Factor Authentication (2FA).
  • Avoid connecting through unsecured public networks.
  • Log out of VPN when no longer in use.

Advanced Features and Configuration

Split Tunneling

Split tunneling allows users to route some traffic through the VPN while letting other traffic go through the local connection. This conserves bandwidth and improves speed.

Certificate-Based Authentication

Advanced users can set up VPN access with certificates rather than passwords. This method enhances security but requires additional setup on both client and server sides.

Logging and Monitoring

Administrators can enable logging to monitor VPN usage, detect anomalies, and maintain performance metrics. SonicWall devices support detailed logs for client connections and errors.

Updating and Maintenance

Keeping the VPN client updated is crucial for security and compatibility. Regularly check for:

  • New client versions on the SonicWall website
  • Firmware updates for the SonicWall firewall
  • Policy or group changes that may impact VPN settings

Conclusion

Secure and reliable remote access is no longer optional in the modern workplace. SonicWall VPN Download SonicWall VPN solutions make it possible to connect seamlessly from various platforms — Windows, macOS, or mobile — with minimal configuration and robust protection. Whether you’re setting up a new VPN connection or troubleshooting an existing one, understanding the features and best practices ensures you get the most out of your VPN experience.

With the proper setup, SonicWall VPN Download SonicWall VPN acts as a secure bridge to your business resources, allowing employees to work efficiently and safely from anywhere in the world.

How Do I Download SonicWall VPN: Complete Guide

In today’s digital landscape, secure communication between remote devices and centralized networks is vital. With businesses increasingly embracing remote work and virtual teams, Virtual Private Networks (VPNs) have become indispensable. SonicWall, a trusted name in network security, Download SonicWall VPN offers a robust VPN solution that enables secure access to enterprise networks from virtually anywhere. This guide provides a comprehensive walkthrough on how to download, install, and configure the SonicWall VPN.

Introduction to SonicWall VPN

SonicWall VPN solutions are widely used to ensure encrypted connections between users and enterprise networks. They come in various formats including:

  • Global VPN Client (GVC)
  • NetExtender
  • Mobile Connect

Each client serves different operating systems and scenarios. Download SonicWall VPN Whether you’re connecting from Windows, macOS, or mobile devices, there’s a SonicWall VPN option for your needs.

Understanding the VPN Options

Global VPN Client (GVC)

Ideal for Windows users, GVC allows remote users to securely connect to the corporate network as if they were physically in the office. It’s best suited for IPsec-based VPNs.

NetExtender

A lightweight SSL VPN client compatible with Windows, Linux, and macOS. NetExtender offers seamless VPN connections and is often used with SonicWall’s Secure Mobile Access (SMA) appliances.

Mobile Connect

SonicWall Mobile Connect is designed for mobile platforms such as iOS and Android. It provides secure mobile VPN connections with minimal configuration.

System Requirements

Before downloading, ensure your system meets the following minimum requirements:

For Global VPN Client:

  • Windows 7, 8, 10, or 11 (32/64-bit)
  • Minimum 512 MB RAM
  • 20 MB free disk space

For NetExtender:

  • Windows, macOS, or Linux
  • Admin privileges to install the client
  • Compatible web browser (Chrome, Firefox, Edge)

For Mobile Connect:

  • iOS version 11 or later
  • Android version 6.0 or later
  • Internet access for app store downloads

Pre-Download Preparation

1. Obtain Credentials from Your Administrator

Before downloading any VPN client, confirm that your administrator has provided the following:

  • Server address or domain name
  • Username and password
  • VPN type (IPsec, SSL)
  • Group or domain details (if applicable)

2. Check Licensing and Firmware

Ensure your SonicWall appliance supports the VPN client you’re downloading. Download SonicWall VPN Some features may require updated firmware or specific licensing options.

3. Enable VPN Access

Make sure the VPN feature is enabled and configured on the firewall or SMA device. The administrator must configure VPN policies and assign user privileges.

Step-by-Step: Downloading the SonicWall VPN

For Windows Users (Global VPN Client)

  1. Visit the official SonicWall support portal.
  2. Navigate to the ‘Downloads’ section.
  3. Select ‘Global VPN Client’ from the list of available software.
  4. Choose the version compatible with your Windows OS.
  5. Click the download button to begin.
  6. Save the file to your local drive.

For macOS and Linux Users (NetExtender)

  1. Visit the SonicWall download portal.
  2. Search for ‘NetExtender’.
  3. Select your operating system.
  4. Download the installation package.
  5. Save the file to your system.

For Mobile Users (Mobile Connect)

  1. Open the App Store (iOS) or Google Play Store (Android).
  2. Search for ‘SonicWall Mobile Connect’.
  3. Tap ‘Install’ to begin the download.

Installation Instructions

Installing Global VPN Client on Windows

  1. Locate the downloaded .exe file.
  2. Double-click to launch the installer.
  3. Follow the on-screen prompts.
  4. Accept the license agreement.
  5. Choose the installation folder (default is usually fine).
  6. Complete the installation and restart if prompted.

Installing NetExtender on macOS or Linux

  1. Open the installation file (.dmg for macOS, .tar.gz or .rpm for Linux).
  2. Drag the application to the Applications folder (macOS).
  3. On Linux, use terminal commands to extract and install.
  4. Launch NetExtender and accept permissions if prompted.

Installing Mobile Connect

  1. Open the installed application.
  2. Grant necessary permissions.
  3. Set up a new connection by entering server and login details.
  4. Save and test the connection.

Configuration and First-Time Use

Creating a Connection Profile (Global VPN Client)

  1. Open the GVC application.
  2. Click ‘New Connection’.
  3. Enter a name for the connection.
  4. Input the server IP or domain.
  5. Choose the authentication method (IKE using Preshared Secret, etc.).
  6. Save and connect.

Using NetExtender

  1. Launch NetExtender.
  2. Enter the server address, username, password, and domain.
  3. Click ‘Connect’.
  4. Accept security certificates if prompted.
  5. Once connected, you can access network resources.

Using Mobile Connect

  1. Open the Mobile Connect app.
  2. Add a new VPN profile.
  3. Fill in the hostname, user credentials, and port number.
  4. Tap ‘Connect’ to establish a secure tunnel.

Troubleshooting Common Issues

Cannot Download the Installer

  • Check your firewall or antivirus settings.
  • Ensure you have the correct administrative privileges.
  • Try using a different browser or device.

Installation Fails

  • Make sure your operating system meets the requirements.
  • Reboot and try again.
  • Remove previous VPN clients that may conflict.

Authentication Errors

  • Double-check your username and password.
  • Confirm account permissions with your network admin.
  • Make sure your VPN policy is properly assigned.

Connection Drops

  • Ensure stable internet connectivity.
  • Disable idle timeout settings.
  • Reconfigure MTU size if using older VPN gateways.

DNS or Network Access Issues

  • Check internal DNS server settings.
  • Use IP addresses to test connectivity.
  • Adjust split-tunneling or full-tunneling policies.

Best Practices for Secure Use

  • Always use strong, unique passwords.
  • Enable two-factor authentication if available.
  • Avoid using public Wi-Fi without proper encryption.
  • Disconnect when the VPN is no longer needed.
  • Keep your client software updated.

Advanced Configurations

Using Certificates for Authentication

  • Import client and server certificates.
  • Configure SonicWall appliance to recognize the certificate chain.
  • Update the VPN profile to use certificate-based authentication.

Site-to-Site VPNs

  • Ideal for branch office connectivity.
  • Requires configuration on both ends (firewall to firewall).
  • Use static IPs and route definitions.

Split Tunneling vs. Full Tunneling

  • Split tunneling allows local internet use.
  • Full tunneling routes all traffic through the VPN.
  • Choose based on security needs and performance.

Maintenance and Updates

Regular updates ensure compatibility and security. Schedule checks for:

  • Client software updates
  • Firmware updates on the SonicWall appliance
  • VPN license expiration

Alternatives and Additional Tools

  • SMA (Secure Mobile Access): Enhanced SSL VPN features.
  • Cloud Edge: Zero Trust Network Access (ZTNA) for cloud-based protection.
  • NSM (Network Security Manager): Centralized management of VPN users and policies.

Summary

Downloading and configuring the SonicWall VPN client is an essential step in ensuring secure remote access to your organization’s network. Download SonicWall VPN Whether you’re using Windows, macOS, Linux, or mobile devices, SonicWall offers tailored solutions for each platform. With proper configuration, the VPN client can be a powerful tool for accessing resources securely and reliably.

By following the detailed steps outlined in this guide, users can avoid common pitfalls and get their VPN up and running in no time. Always stay updated and Download SonicWall VPN consult your network administrator for customized configurations and security enhancements.

Fix SonicWall VPN Login Issues: Common Problems & Solutions

SonicWall is widely known for its robust cybersecurity solutions, particularly in network firewall protection, VPN access, and unified threat management. SonicWall VPN Login However, even the most reliable systems can encounter occasional hiccups. One of the most commonly reported issues by SonicWall users is difficulty during login. SonicWall VPN Login This article provides a comprehensive exploration of the various problems users face when logging into their SonicWall devices and the most effective strategies for troubleshooting and resolving these issues.

Understanding SonicWall Login Access

Before diving into the problems and solutions, it’s important to understand how SonicWall login works. The device interface can typically be accessed via a browser by entering the IP address of the SonicWall appliance. SonicWall VPN Login Once the login page is loaded, users are prompted to enter their credentials to access and manage configurations.

Common use cases for accessing the SonicWall interface include:

  • Managing firewall rules
  • Configuring VPN settings
  • Monitoring network traffic
  • Updating firmware
  • Creating or managing user access controls

Login issues prevent users from performing these crucial administrative tasks, which can affect overall network security and performance.

Common SonicWall Login Problems

1. Incorrect Login Credentials

This is the most frequent issue. Users may enter the wrong username or password due to typographical errors, expired passwords, or forgetting the correct login information.

2. Browser Compatibility Issues

Sometimes, the web interface fails to load properly because of incompatible or outdated browsers. SonicWall VPN Login Browser extensions or pop-up blockers may also interfere with the login page.

3. IP Address Not Reachable

If the SonicWall device’s IP address changes or if the user is on a different subnet, they may not be able to reach the login page.

4. Locked or Expired Account

Multiple failed login attempts may cause the account to be locked. In some configurations, accounts may expire after a set period.

5. SSL Certificate Errors

Accessing the SonicWall interface over HTTPS with a self-signed certificate can lead to browser warnings. These warnings sometimes block access altogether.

6. GUI Not Loading

Sometimes the graphical user interface may fail to display or respond due to issues with JavaScript, cookies, or browser settings.

7. Firmware Glitches

Old or corrupted firmware may create performance issues, causing the login interface to crash or behave erratically.

8. Network Configuration Problems

Incorrect VLAN, DHCP, or static IP configurations can prevent access to the login portal.

9. Session Timeouts and Concurrent Logins

Some configurations limit simultaneous logins or have session timeouts that disconnect users abruptly.

10. Remote Access Restrictions

If remote access settings are not correctly configured, users trying to log in from outside the network will be blocked.

Diagnosing Login Issues

Troubleshooting SonicWall login problems SonicWall VPN Login begins with identifying the root cause. Here’s how to systematically diagnose the issue:

  • Ping the device: Use command-line tools to ping the SonicWall IP.
  • Check physical connections: Ensure cables are connected properly.
  • Test multiple browsers: Try accessing the device from different web browsers.
  • Attempt local access: If remote login fails, try accessing locally within the network.
  • Use SafeMode: For serious issues, reboot into SafeMode to regain access.

Solutions to Common Login Problems

Solution 1: Reset Login Credentials

If you’ve forgotten your login information:

  • Try the default credentials (commonly admin/admin or admin/password)
  • Use the password recovery option if enabled
  • Reset the device to factory settings if no credentials work (Note: This erases all settings)

Solution 2: Use a Supported Browser

  • Clear the browser cache and cookies
  • Disable unnecessary extensions
  • Use latest versions of browsers like Chrome, Firefox, or Edge
  • Use Incognito or Private mode to avoid cached sessions

Solution 3: Verify IP Configuration

  • Confirm your device is on the same subnet
  • Check your IP settings (DHCP vs. Static)
  • Connect directly to the SonicWall LAN port for testing

Solution 4: Unlock User Account

  • Wait for the automatic unlock period
  • Access using another admin account and unlock the user
  • Reboot the SonicWall if necessary

Solution 5: Address SSL Issues

  • Click “Advanced” in your browser to proceed despite warnings
  • Install a valid certificate to avoid future issues
  • Add exceptions in your browser settings if needed

Solution 6: Update Firmware

  • Log in via SafeMode if standard interface fails
  • Download the latest firmware from SonicWall’s website
  • Upload and apply it through SafeMode GUI
  • Always backup configuration before updating

Solution 7: Reconfigure Network Settings

  • Make sure DHCP is enabled if dynamic IP is used
  • Manually assign a compatible static IP on your PC for testing
  • Use an Ethernet connection rather than Wi-Fi during troubleshooting

Solution 8: Use Console Access

When all else fails:

  • Connect to the device via console cable
  • Use terminal emulation software like PuTTY
  • Reset passwords or network settings via CLI

Solution 9: Check Concurrent Session Limits

  • Log out of all sessions and try again
  • Increase session timeout or concurrent login settings

Solution 10: Correct Remote Access Settings

  • Ensure correct NAT and firewall rules
  • Verify SSL VPN configuration
  • Whitelist IPs if using geographic or IP-based access controls

Preventing Future Login Issues

Use Strong, Regularly Updated Passwords

Avoid default or predictable passwords. SonicWall VPN Login Use a mix of letters, numbers, and special characters.

Enable Two-Factor Authentication

This adds a layer of protection and helps prevent unauthorized access.

Maintain Updated Firmware

Check regularly for firmware updates that fix bugs and enhance security.

Backup Device Configuration

Before making changes, create a backup. In the event of failure, a backup allows quick restoration.

Use Multiple Admin Accounts

Avoid putting all access under a single admin account. Create secondary accounts for redundancy.

Monitor Device Logs

Review login logs periodically for signs of unauthorized access or recurring issues.

Schedule Maintenance Windows

Avoid making major changes during business hours. Plan updates or configuration changes during low-traffic periods.

When to Contact SonicWall Support

If all troubleshooting steps fail, contact SonicWall technical support. Be ready to provide:

  • Device model and serial number
  • Firmware version
  • Description of the problem
  • Screenshots or log files

SonicWall support can offer advanced diagnostics, help with warranty replacements, or assist with license and update issues.

Conclusion

Login issues with SonicWall devices can range from simple browser incompatibilities to complex network configuration errors. By understanding the typical problems and applying structured solutions, SonicWall VPN Login users can resolve most login challenges efficiently. Keeping firmware updated, maintaining secure access protocols, and following best practices will help prevent these problems from recurring.

This guide provides a clear path to troubleshooting and resolving login problems while offering preventative strategies to maintain uninterrupted and secure access to SonicWall devices. SonicWall VPN Login With the right tools and knowledge, managing network security through SonicWall becomes a smooth and reliable process.

Accessing Your SonicWall VPN Account: Quick Login Tips

In today’s digital landscape, network security is more important than ever. SonicWall, a global leader in cybersecurity, provides advanced firewall and VPN solutions trusted by organizations worldwide. SonicWall VPN Login Despite the robust features SonicWall offers, users occasionally encounter login problems that disrupt access and impact security administration. These issues can be frustrating, especially when they prevent urgent configurations or monitoring.

This detailed guide explores how to effectively fix SonicWall login issues. SonicWall VPN Sign in It breaks down the most common problems and provides practical, step-by-step solutions. SonicWall VPN Login Whether you’re an IT administrator, a support technician, or a regular user, this article will help you navigate and resolve login issues with confidence.

Understanding SonicWall Login

SonicWall devices can be accessed through various interfaces:

  • Web Management Interface (browser-based login)
  • Secure Mobile Access (SMA)
  • VPN Portals
  • Console Access (CLI)

Each of these access points has its own potential pitfalls and troubleshooting methods. SonicWall VPN Login When login issues arise, they typically stem from configuration errors, network issues, authentication problems, or browser incompatibilities.

Common Problems That Prevent Successful Login

Let’s explore some of the most frequent obstacles users face when trying to access SonicWall devices.

1. Incorrect Username or Password

Perhaps the most basic but common problem—typing the wrong credentials. SonicWall passwords are case-sensitive, and too many failed attempts can lead to account lockouts.

2. Locked or Expired Accounts

User accounts might become locked due to too many failed login attempts or could expire based on administrator-defined rules.

3. Browser Incompatibility or Cache Issues

The SonicWall GUI relies on certain web technologies. SonicWall VPN Sign in An outdated browser or corrupted cache may result in a login page that doesn’t render properly or fails to load.

4. SSL Certificate Errors

SonicWall often uses self-signed certificates. This can prompt modern browsers to flag the login page as “insecure,” causing users to panic or get blocked by corporate firewall rules.

5. Incorrect IP Address

Sometimes, the IP address used to access the SonicWall is incorrect or unreachable. This could happen due to network reconfiguration or a DHCP assignment change.

6. Network Configuration Problems

Improper VLAN setups, misconfigured subnets, SonicWall VPN Sign in or unresponsive interfaces can prevent connectivity between your device and the SonicWall appliance.

7. Firmware Glitches

Older firmware versions may have bugs or compatibility issues that cause the login process to fail intermittently or completely.

8. Remote Access Configuration Errors

Users accessing the SonicWall remotely may encounter login issues if VPN, port forwarding, or remote access rules aren’t configured properly.

Solutions to Fix SonicWall Login Issues

Understanding the root of the problem is half the battle. SonicWall VPN Login Here’s how you can resolve each of the common login problems identified above.

Solution 1: Validate Your Credentials

  • Double-check username and password entries.
  • Disable Caps Lock and check for accidental spaces.
  • If you’ve forgotten your password, use a recovery method or contact an administrator.
  • Default credentials on a new device might be:
    • Username: admin
    • Password: (blank) or “password”

Be sure to change default credentials after the initial login to ensure security.

Solution 2: Unlock or Reset the Account

If your account is locked:

  • Wait for the lockout period to expire (if configured).
  • Use another admin account to unlock the user.
  • If no other accounts are available, access the device through SafeMode or CLI to perform a reset.

Solution 3: Use a Compatible Browser and Clear Cache

Some SonicWall interfaces may not work well with outdated or incompatible browsers. Try the following:

  • Use Chrome, Firefox, or Edge.
  • Clear your browser’s cache and cookies.
  • Disable extensions that may interfere with web content.

If the login page doesn’t render correctly, test it in incognito or private mode to rule out extension conflicts.

Solution 4: Handle SSL Certificate Warnings

Browsers like Chrome and Firefox will display warnings for self-signed certificates. If you trust the source:

  • Click “Advanced” and then “Proceed to site.”
  • To eliminate these warnings permanently, SonicWall VPN Login install a valid SSL certificate from a trusted Certificate Authority on your SonicWall appliance.

Solution 5: Verify the IP Address

If you can’t reach the login page:

  • Check the IP address settings of your computer.
  • Use the default IP (commonly 192.168.168.168 for SonicWall) and configure your computer to be in the same subnet.
  • Use ping or traceroute commands to check connectivity.
  • Try accessing the login page from a different machine to isolate the problem.

Solution 6: Reconfigure Network Settings

Network misconfigurations can block login access. Consider the following:

  • Make sure you’re connected to the correct VLAN or subnet.
  • Disable secondary network interfaces temporarily.
  • Ensure there’s no firewall or policy rule blocking your access from the current IP range.

Solution 7: Update Firmware

Old firmware may be the root cause of login instability. To update:

  • Download the latest firmware version from the official support site.
  • Use SafeMode or CLI to upload and install it.
  • Reboot the device post-update.

Firmware updates often come with security patches and bug fixes that can resolve hidden issues.

Solution 8: Configure Remote Access Properly

If you’re accessing the SonicWall remotely:

  • Ensure the WAN interface is reachable.
  • Validate VPN policies and IP whitelisting.
  • Use public IP or FQDN that resolves correctly.
  • Confirm that SSL VPN or Global VPN client settings are correctly applied.

SafeMode Access for Emergency Recovery

SafeMode is a recovery interface used when normal login methods fail. To enter SafeMode:

  1. Power off the SonicWall device.
  2. Hold the reset button while powering it back on.
  3. Connect a PC directly to the LAN port.
  4. Access SafeMode using the default IP address.

From here, you can:

  • Reset administrator passwords
  • Upload new firmware
  • Restore configuration backups

Use SafeMode carefully, as changes here can significantly affect the device’s behavior.

Preventing Future Login Issues

Once you’ve resolved login issues, take the following steps to minimize recurrence.

1. Set Strong, Memorable Passwords

Use a password manager to maintain strong credentials that you can easily retrieve without compromising security.

2. Enable Two-Factor Authentication

Most modern SonicWall appliances support 2FA, which adds another security layer and helps avoid brute-force attacks.

3. Monitor Logs Regularly

Keep an eye on login attempt logs. Too many failed logins could indicate an attack or misconfigured script.

4. Create Multiple Admin Accounts

Avoid relying on a single admin account. Create multiple administrator roles to prevent lockouts and share administrative responsibilities.

5. Schedule Firmware Updates

Don’t wait for problems to arise. Schedule firmware reviews and updates quarterly to ensure optimal performance and security.

6. Backup Your Configuration Frequently

Before making any changes, especially involving firmware or network policies, save your configuration. This allows for easy rollback if needed.

When to Contact Support

If you’ve exhausted all troubleshooting steps and still can’t access your SonicWall device, SonicWall VPN Login contact technical support. Have the following ready:

  • Device model and serial number
  • Current firmware version (if known)
  • Troubleshooting steps already attempted
  • Screenshots or logs showing errors

SonicWall support teams can assist with device-specific bugs, licensing issues, or deep-dive diagnostics beyond what’s available to users.

Conclusion

Login issues with SonicWall devices are not uncommon, but they are rarely unsolvable. With a structured approach to troubleshooting and preventive maintenance, these problems can be minimized or eliminated. SonicWall VPN Login Whether it’s a locked account, a firmware glitch, or a misconfigured network setting, identifying the problem early and knowing how to address it makes all the difference.

By understanding how to fix SonicWall login issues and being aware of the common problems and solutions, you can ensure secure, uninterrupted access to your critical network infrastructure. SonicWall VPN Sign in Taking proactive steps today can prevent costly downtime and safeguard your organization’s digital assets tomorrow.

Fix SonicWall VPN Login Issues: Common Problems & Solutions

SonicWall is a recognized leader in network security, offering comprehensive firewall protection, secure remote access, and unified threat management. SonicWall VPN Login However, as with any complex networking equipment, users occasionally face login issues that can be disruptive. Whether you are a network administrator or an end user, understanding the root causes of login problems and how to resolve them is essential. This guide explores in detail the most common login challenges associated with SonicWall devices and provides practical solutions for each scenario.

Introduction to SonicWall Login Interface

The SonicWall login interface is the control center for accessing the appliance’s configuration and management tools. Users log into this interface to:

  • Configure firewall rules
  • Set up VPN connections
  • Manage user access and authentication
  • Monitor traffic and threat activity
  • Apply firmware updates

Login failures prevent users from managing the device and securing the network effectively, so addressing these issues promptly is critical.

Common Login Issues

1. Incorrect Credentials

One of the most frequent issues is entering incorrect login details. This could be due to:

  • Typographical errors
  • Forgotten passwords
  • Caps lock being turned on
  • Misuse of case-sensitive characters

2. IP Address Unreachable

Users may be unable to access the login page because the device’s IP address is not responding. Possible causes include:

  • Network disconnection
  • Wrong IP address
  • Hardware issues
  • Faulty Ethernet cable

3. SSL Certificate Warnings

SonicWall often uses a self-signed SSL certificate, SonicWall VPN Login which may trigger browser warnings. While this doesn’t prevent login, it can deter users from proceeding.

4. GUI Not Displaying Properly

Users sometimes report that the graphical user interface fails to load completely. This can result from:

  • Browser incompatibility
  • Corrupted browser cache
  • Outdated firmware

5. Locked Account

After multiple failed login attempts, the account might be locked due to security settings. Depending on the configuration, accounts may unlock automatically or require manual intervention.

6. Session Timeouts

If the session expires due to inactivity, users may find themselves logged out unexpectedly. This can lead to confusion and wasted time.

7. Firmware Bugs

Firmware-related glitches can cause issues ranging from unresponsive interfaces to complete login failure. Updating the firmware often resolves these problems.

8. Network Configuration Errors

Incorrect VLAN settings, subnet mismatches, or DHCP issues can all result in users being unable to reach the login page.

9. Browser Security Settings

Overly aggressive browser security settings or extensions can block scripts necessary for the login interface to function properly.

Diagnosing and Fixing Login Problems

To address login issues systematically, consider the following step-by-step solutions.

Step 1: Check Network Connectivity

  • Ensure the SonicWall appliance is powered on and connected to your local network.
  • Ping the device using its known IP address (commonly 192.168.168.168).
  • Use the Command Prompt or Terminal:
ping 192.168.168.168

If the device does not respond, verify the Ethernet cable and switch port.

Step 2: Verify IP Address

If you can’t access the interface through the expected IP address:

  • Connect a device directly to the appliance.
  • Assign a static IP to your computer in the same range (e.g., 192.168.168.100).
  • Retry accessing the web interface using the browser.

Step 3: Confirm Login Credentials

  • Use known valid credentials. Default settings are:
    • Username: admin
    • Password: password or left blank (varies by model)
  • If login fails, check for typos, extra spaces, and character case.
  • Reset the password using recovery procedures if necessary.

Step 4: Bypass SSL Warnings

If you see a browser warning about an insecure connection:

  • Click “Advanced” or a similar link.
  • Proceed to the IP address.
  • After logging in, install a trusted SSL certificate to avoid future warnings.

Step 5: Clear Cache and Switch Browsers

If the GUI fails to load or displays incorrectly:

  • Clear browser cache, cookies, and history.
  • Disable extensions or try incognito/private browsing.
  • Try a different browser (Chrome, Firefox, Edge, etc.).

Step 6: Unlock the Account

If the account is locked:

  • Wait for the timeout period (if configured).
  • Reboot the device if necessary.
  • Use another admin account to unlock the locked user.

Step 7: Update the Firmware

Older firmware can cause instability and login issues.

  • Access SafeMode by rebooting the device and pressing the reset button.
  • Use SafeMode to upload the latest firmware.
  • Always back up configurations before upgrading.

Step 8: Use Console Access

If all web-based access fails:

  • Connect via a serial cable and access the CLI (Command Line Interface).
  • Use terminal software to perform diagnostics.
  • From the CLI, you can restart services or reset credentials.

Step 9: Factory Reset

Use this only as a last resort:

  • Hold the reset button for 10+ seconds.
  • The device will revert to factory settings.
  • Reconfigure from scratch using default credentials.

Preventative Measures

To reduce the likelihood of login issues recurring, implement the following best practices.

Use Strong Passwords

Avoid default or simple passwords. Change passwords regularly and enforce complexity requirements.

Enable Two-Factor Authentication

Adding a second layer of verification strengthens account security and prevents unauthorized access.

Maintain Firmware Updates

Regularly update the device to benefit from performance improvements, bug fixes, and new security features.

Monitor Logs

Login attempts, failed access, and other critical activities should be logged and reviewed regularly.

Backup Configurations

Before making changes, back up the system configuration. This allows for quick recovery in case of error.

Train Users

Ensure that all users who access the SonicWall device are trained in secure access procedures and know how to report issues.

Conclusion

Login problems with SonicWall devices can be frustrating and disruptive, but most are easily diagnosed and resolved with a systematic approach. SonicWall VPN Login By understanding the common causes, applying effective troubleshooting techniques, and following best practices, users and administrators can restore access quickly and prevent future problems. As networks continue to evolve, staying informed and proactive about security and access SonicWall VPN Login protocols is essential for maintaining a reliable and secure infrastructure.

How To Log In to SonicWall VPN: A Step-by-Step Guide

In today’s increasingly digitized and mobile workplace, network security is no longer just a technical requirement—it is a fundamental business necessity. Login SonicWall VPN has earned a reputation for providing robust security solutions, especially for small to medium-sized enterprises and large corporations. Among its various features, the ability to log into SonicWall devices or portals effectively and securely is one of the most crucial starting points for managing firewalls, SonicWall VPN Login virtual private networks (VPNs), and other network security services.

This comprehensive guide offers a detailed walkthrough on how to access your SonicWall device or web management interface properly, whether you’re a system administrator configuring security parameters or an end-user setting up secure remote access. Login SonicWall VPN The step-by-step breakdown will also cover recommended practices to ensure a smooth, secure, and efficient login process.

Understanding the Purpose of the Login Interface

The login interface SonicWall VPN Login serves as the gateway to the SonicWall security appliance or portal. It allows authorized users to:

  • Configure network and firewall settings
  • Set up VPN connections
  • Manage user access and permissions
  • Apply firmware updates
  • Monitor network activity
  • Troubleshoot connectivity or security issues

Having secure access to this interface ensures that only authorized personnel can make changes to critical security configurations.

Prerequisites Before You Begin

Before attempting to log into your SonicWall device or portal, Login SonicWall VPN ensure that the following conditions are met:

  1. Device Connection: You must be connected either directly to the SonicWall appliance (via Ethernet) or to the same network segment.
  2. Default IP Address: Most SonicWall appliances use a default IP like 192.168.168.168 or another LAN interface IP. You must know this to reach the login page.
  3. Credentials: Ensure you have valid administrator or user credentials. The default username is often “admin,” but it’s highly advisable that this is changed after initial setup.
  4. Supported Browser: Use a modern, updated browser (Chrome, Firefox, Edge, Safari) to avoid interface issues.
  5. Firewall Access: Confirm that your network firewall or antivirus isn’t blocking the interface connection.

Step-by-Step Instructions for Accessing the SonicWall Login Page

Step 1: Connect to the Network

Begin by connecting your computer or device to the same network as the SonicWall appliance. SonicWall VPN Login If this is your first-time configuration, you may need to use a direct Ethernet connection.

  • For hardware-based firewalls: Plug your Ethernet cable into the LAN port on the device.
  • For cloud-based or remote access: Ensure your computer is connected to the secure VPN or LAN network.

Step 2: Open a Web Browser

Launch a secure, updated web browser on your device. Login SonicWall VPN While most modern browsers are supported, some older versions may not render the login interface correctly.

  • Recommended: Google Chrome or Mozilla Firefox
  • Acceptable alternatives: Microsoft Edge, Apple Safari

Avoid using incognito or private mode unless required, as session cookies might be blocked.

Step 3: Enter the SonicWall IP Address

In the browser’s address bar, enter the IP address assigned to the SonicWall device. Common defaults include:

  • 192.168.168.168 (factory default)
  • 192.168.1.1 (common for local network firewalls)
  • Or a custom IP defined during network setup

Press Enter to proceed. This should direct you to the login screen of the SonicWall user interface.

Note: If the page doesn’t load, double-check the IP address and your device’s connectivity.

Step 4: Access the Login Page

Once the interface loads, you’ll see a login screen prompting for a username and password. SonicWall VPN Login This page is secured via HTTPS. Depending on your setup, you might receive a browser warning about an untrusted SSL certificate. This is normal for first-time setups or self-signed certificates.

  • Proceed by accepting the risk temporarily
  • Replace the certificate later with a trusted SSL certificate to avoid these warnings permanently

Step 5: Enter Your Credentials

Enter the login credentials provided to you. Typically:

  • Username: admin (default)
  • Password: password or the unique password printed on the device

If the device was previously configured, use the current login information. Click Login after entering the credentials.

If successful, the SonicWall management dashboard will appear.

Additional Login Scenarios

Logging into SonicWall Cloud Management

If your organization uses cloud-based SonicWall services, SonicWall VPN Login such as the Capture Security Center or cloud-delivered firewalls, the login process is slightly different.

  • Visit the appropriate SonicWall cloud portal from your browser
  • Enter the provided cloud account email and password
  • Use two-factor authentication (if enabled)
  • Navigate to the correct device or service dashboard

Cloud-based logins may also include administrative roles, Login SonicWall VPN subscription status, or multi-site device management tools.

Using NetExtender for VPN Access

NetExtender is SonicWall’s SSL VPN client, allowing remote users to securely connect to the corporate network.

Steps for logging in:

  1. Download the NetExtender client from your SonicWall device or portal
  2. Install the application on your operating system
  3. Launch the client and enter the VPN server address
  4. Provide your username, password, and domain (if applicable)
  5. Click Connect to establish the session

Once connected, your computer behaves as if it’s on the internal network, granting access to authorized resources.

Troubleshooting Login Issues

If you encounter problems SonicWall VPN Login accessing the login page or completing the login process, consider the following solutions:

Page Not Loading

  • Ensure you’re connected to the correct network
  • Confirm the IP address is correct
  • Check for IP conflicts or subnet mismatches
  • Disable browser extensions that may interfere with HTTPS

Invalid Credentials

  • Make sure CAPS LOCK is off
  • Try resetting the password through local recovery (if configured)
  • Contact your network administrator for credential resets

Certificate Warnings

  • Use HTTPS instead of HTTP
  • Import or install a trusted SSL certificate on the SonicWall device
  • Avoid ignoring SSL warnings long-term; replace self-signed certificates

Enhancing Login Security

Logging into a device is one thing—ensuring that process is secure is another. Login SonicWall VPN Here are ways to secure your access points:

Enable Two-Factor Authentication

Adding a second layer of security ensures that even if a password is compromised, access is denied without the additional verification factor (e.g., app token or email OTP).

Use Role-Based Access Control

Create different user roles with restricted permissions. For example, grant full admin rights only to IT staff and read-only access to auditors or compliance officers.

Change Default Login Credentials Immediately

Default usernames and passwords are widely known and are a major vulnerability. Always customize credentials as part of the first-time setup process.

Limit Login Attempts

Implement account lockout policies after a set number of failed login attempts. This helps deter brute-force login attacks.

Enable Session Timeout Policies

Automatically log users out after a period of inactivity. This reduces the risk of unauthorized access from unattended devices.

Regular Maintenance and Monitoring

Audit Login Logs

SonicWall appliances maintain logs of successful and failed login attempts. Regularly review these logs to identify unusual behavior.

Apply Firmware Updates

SonicWall frequently releases updates that patch known vulnerabilities. Schedule regular updates to maintain security.

Backup Configuration Settings

Before making significant changes, create a backup of your current configuration. Login SonicWall VPN This will help you recover quickly if anything goes wrong.

Remote Management Considerations

If managing SonicWall remotely:

  • Ensure that remote management is enabled only when necessary
  • Restrict access by IP or region
  • Require VPN access to reach the login interface
  • Regularly audit remote access logs

Consider integrating with a centralized management console if you are managing multiple devices across different locations.

Mobile Access to the Interface

Some SonicWall models support mobile browser access. While not always ideal due to limited screen real estate, mobile access may be helpful for emergency troubleshooting.

To access from a mobile device:

  • Ensure Wi-Fi or VPN connection is secure
  • Use a mobile browser that supports JavaScript and SSL
  • Log in using your regular credentials

For security, avoid performing advanced configurations from a mobile interface unless absolutely necessary.

Training and User Awareness

Technical solutions must be complemented by human behavior. Ensure that all users with access to the SonicWall interface:

  • Understand the importance of strong passwords
  • Can identify phishing attacks
  • Know how to report suspicious login activity
  • Participate in security training sessions

An informed user is your first line of defense against security breaches.

Conclusion

Logging into SonicWall may seem like a simple process, but it’s the first and most critical step toward managing a secure network environment. Login SonicWall VPN Whether you’re configuring a new firewall, enabling VPN for a distributed workforce, or auditing access logs, understanding how to access and secure this portal is essential.

With a structured approach, secure credential practices, and the right tools in place, you can ensure that access to your SonicWall environment remains protected against evolving threats. SonicWall VPN Login Make it a habit to regularly review access policies, monitor login attempts, and educate users to maintain a robust and secure network infrastructure.

Is Your SonicWall VPN Login Secure? What You Need to Know

In the digital age, virtual private networks (VPNs) have become vital tools for remote access and data protection. Businesses of all sizes rely on VPNs to allow employees to connect securely to internal systems. SonicWall VPN Login One of the leading providers in this space is SonicWall, known for its advanced firewall and VPN capabilities. However, even the best technology can become a vulnerability if not properly configured or managed. SonicWall VPN Login That brings us to the fundamental question: how secure is your login process?

This article aims to provide an in-depth guide to ensuring your VPN login is locked down, covering technical configurations, authentication protocols, user best practices, and the broader cybersecurity context. Login SonicWall VPN Whether you’re a network administrator or a business owner, SonicWall VPN Login the following insights will help you keep unauthorized users at bay and maintain robust control over remote access.

The Rising Importance of VPN Security

Remote work, cloud services, and bring-your-own-device policies have fundamentally changed how networks operate. With more users accessing internal systems from various locations, SonicWall VPN Login the network perimeter has become blurry. VPNs are no longer optional—they are a security cornerstone.

But with increased reliance on VPNs comes increased interest from cyber attackers. Login credentials are a common target in phishing campaigns, brute force attacks, and other intrusion attempts. Once inside, Login SonicWall VPN attackers can traverse the network, exfiltrate data, or launch ransomware attacks. This underscores why VPN login security must be prioritized.

Common Weak Points in VPN Logins

Understanding potential vulnerabilities is the first step to defending against them. Here are some of the most common weak points found in VPN configurations:

1. Weak or Default Credentials

Using simple or default usernames and passwords is an open invitation to attackers. SonicWall VPN Login Many breaches occur due to poor credential hygiene, such as “admin/admin” setups or easily guessable passwords.

2. Absence of Multi-Factor Authentication

Passwords alone are not enough. If an attacker gains access to a user’s login credentials, the VPN can be accessed from anywhere unless there’s an additional layer of authentication.

3. Outdated Firmware

Firmware vulnerabilities are a goldmine for attackers. Unpatched software can be exploited using known vulnerabilities, allowing attackers to bypass the login process or execute malicious code.

4. Improper Role Assignments

Over-permissioned accounts create risk. SonicWall VPN Login If every user has access to critical network segments, a single compromised account can wreak havoc.

5. Unsecured Client Devices

Security doesn’t end at the VPN. If the user’s endpoint is infected with malware or lacks antivirus protection, credentials and sessions can be compromised.

Building a Secure VPN Login Strategy

Securing your VPN login requires a multi-layered approach that combines configuration, SonicWall VPN Login policy, and user behavior. Let’s break down the key components of a robust strategy.

1. Enforce Strong Credential Policies

All user accounts should be subject to strict password requirements. These should include:

  • Minimum of 12 characters
  • Use of upper and lowercase letters, numbers, and symbols
  • No dictionary words or personal information
  • Expiration and rotation policies
  • Prevention of reuse for previous passwords

Additionally, consider using account Login SonicWall VPN lockout policies after a certain number of failed login attempts to prevent brute-force attacks.

2. Deploy Multi-Factor Authentication

Adding another SonicWall VPN Login step to the login process is one of the most effective ways to improve security. This could include:

  • Time-based one-time passwords (TOTP)
  • Push notifications via authentication apps
  • Biometrics (fingerprint, facial recognition)
  • Security keys

Even if a password is compromised, MFA makes unauthorized login much more difficult.

3. Use Certificate-Based Authentication

Digital certificates provide a strong alternative to traditional credentials. SonicWall VPN Login They can be stored on specific devices and verified by the server during login, ensuring only authorized hardware can connect.

Certificates reduce the risk of credential phishing and eliminate the need for password resets. Managing certificates requires a public key infrastructure, but the added complexity brings significant security benefits.

4. Role-Based Access Control

VPN access should be granted based on the principle of least privilege. Login SonicWall VPN This means users only get access to the systems they need to do their job.

You can achieve this by creating user groups with specific permissions and applying policies accordingly. For example, an HR user might have access to personnel records but no access to network infrastructure.

5. Update and Patch Frequently

Keeping your firewall and VPN firmware updated is essential. SonicWall VPN Login Manufacturers regularly release patches that fix critical vulnerabilities. You should:

  • Subscribe to vendor security alerts
  • Schedule monthly patch reviews
  • Test updates in a controlled environment
  • Document all changes for audit compliance

Outdated systems are often the easiest entry points for attackers.

Securing the Client Side

A secure login doesn’t just depend on what happens on the server. The user’s device is equally critical.

1. Approved Client Software Only

Ensure that all users download the VPN client from official sources. Unsupported or pirated versions can contain backdoors or security flaws.

Set up clear internal procedures to guide users through proper installation and usage. In many organizations, the IT team pre-configures client devices to avoid user-side errors.

2. Device Posture Check

Before granting access, verify the security posture of the connecting device. This could include:

  • Operating system updates
  • Antivirus status
  • Disk encryption
  • Root/jailbreak detection (for mobile)

Integrate these checks into your VPN login workflow to ensure only secure devices are allowed.

3. Endpoint Protection

Install endpoint detection and response (EDR) tools on all user devices. SonicWall VPN Login These tools monitor behavior and detect anomalies in real-time, offering a layer of defense even after a successful login.

Monitor and Audit Login Activity

You can’t protect what you don’t monitor. Regular auditing of VPN login activity is essential to identifying risks and improving security protocols.

Key Metrics to Track:

  • Number of failed login attempts
  • Time and location of each login
  • Account lockout incidents
  • Concurrent session statistics
  • New device logins

Use these insights to detect suspicious activity and enforce security policies accordingly. For example, multiple failed logins from a foreign IP might indicate a credential stuffing attempt.

Implementing Session and Timeout Controls

Long-lasting or unattended VPN sessions are a serious risk. You should implement the following policies:

  • Idle session timeouts (e.g., 15 minutes of inactivity)
  • Maximum session durations (e.g., 8 hours)
  • Automatic logouts at predefined times
  • Session revalidation after network changes

By enforcing these controls, you reduce the chances of an attacker taking over an unattended session.

Integrating VPN Access into Broader IT Policies

VPN login security must be part of your broader IT security framework. This includes:

  • Network segmentation
  • Data encryption in transit and at rest
  • Incident response planning
  • Compliance with regulations (GDPR, HIPAA, etc.)

Make sure all VPN usage aligns with organizational cybersecurity goals. SonicWall VPN Login Maintain documentation of user access levels, authentication methods, and session logs for auditing.

User Training and Awareness

Even with the best security settings, human error can undermine everything. That’s why continuous user education is critical.

Training topics should include:

  • Recognizing phishing attempts
  • Using password managers
  • Understanding the role of MFA
  • Responding to suspicious activity
  • Safe handling of corporate devices

Gamify your training modules with quizzes or simulations to improve engagement. Regularly update users about evolving threats and policy changes.

Response Planning for Breaches

Sometimes, breaches still happen. SonicWall VPN Login Having a response plan ensures you can act swiftly and decisively. Your plan should include:

  • Notification protocols for users and stakeholders
  • Procedures for revoking access and resetting credentials
  • Isolation of affected systems
  • Communication with legal and compliance teams
  • Forensic investigation to determine the breach origin

Include VPN-specific scenarios in your incident response drills to test your team’s readiness.

Red Team Testing and Penetration Assessments

Security must be continuously evaluated. Login SonicWall VPN Red teaming and penetration testing simulate real-world attacks and uncover weaknesses in your system before malicious actors do.

Hire certified professionals to conduct assessments focusing on:

  • Authentication bypass attempts
  • VPN endpoint vulnerabilities
  • Session hijacking scenarios
  • User privilege escalation

Use the results to refine your login processes and close gaps in your defenses.

Adapting to Emerging Trends

Technology and threats evolve quickly. Stay ahead by monitoring trends such as:

  • Passwordless authentication
  • Behavioral biometrics
  • AI-driven threat detection
  • Decentralized identity management
  • Zero Trust Architecture

Incorporate innovations that align with your risk tolerance and operational capabilities.

Conclusion

Remote access is no longer a convenience—it’s a necessity. Login SonicWall VPN But it comes with risks that must be carefully managed. SonicWall offers powerful tools for secure connectivity, but the true strength of your VPN lies in how you implement and monitor it.

SonicWall VPN Login By focusing on strong authentication, frequent monitoring, client-side hygiene, and user education, you build a formidable defense against both internal and external threats. Security isn’t a one-time project—it’s an ongoing process that evolves with technology and organizational needs.

Secure Your Network with SonicWall VPN Login Best Practices

In today’s hyper-connected world, network security is not a luxury—it’s a necessity. With an ever-increasing number of remote workers, mobile devices, and evolving cyber threats, SonicWall VPN Login organizations must invest in robust security strategies. Virtual Private Networks (VPNs) serve as a frontline defense, and SonicWall stands out as one of the most reliable providers of secure VPN solutions. However, Login SonicWall VPN having the right tools is only half the battle. Knowing how to use them effectively is what truly protects an enterprise from data breaches, malware, and cyberattacks.

This guide explores the essential best practices for logging in to SonicWall VPN, ensuring optimal security and peace of mind for businesses of all sizes.

Understanding the Importance of VPN Login Security

A VPN acts as a secure tunnel between a user and the corporate network. It encrypts data, masks IP addresses, and ensures that sensitive information doesn’t fall into the wrong hands. SonicWall VPN Login However, if the login process is weak or improperly configured, the entire system becomes vulnerable.

Attackers often exploit poor authentication practices, default credentials, or unpatched vulnerabilities. By strengthening the login process, Login SonicWall VPN organizations can drastically reduce the risk of unauthorized access.

SonicWall VPN: A Brief Overview

SonicWall provides comprehensive cybersecurity solutions, including next-gen firewalls, endpoint protection, and VPNs. Its VPN solution supports both SSL and IPSec technologies and caters to SonicWall VPN Login organizations that require secure remote access to their internal network infrastructure.

SonicWall VPN features include:

  • End-to-end encryption
  • Multi-platform support (Windows, macOS, Linux, iOS, Android)
  • Two-factor authentication (2FA)
  • Role-based access controls
  • Centralized management

These capabilities make SonicWall an excellent choice for businesses looking to secure remote communications.

Initial Configuration: Laying the Foundation for Security

Before implementing advanced practices, start with the basics:

1. Use Strong Administrator Credentials

Avoid using default admin usernames like “admin” or “administrator.” Create unique usernames and use strong, complex passwords containing uppercase and lowercase letters, Login SonicWall VPN numbers, and symbols. Change these credentials regularly and restrict administrative access to trusted personnel only.

2. Update Firmware

Ensure the SonicWall firmware is up to date. SonicWall VPN Login Regular updates fix vulnerabilities and improve security performance. Configure automatic alerts for available updates and schedule routine patch management.

3. Configure Secure Authentication Protocols

SonicWall supports multiple authentication methods, including:

  • Local User Authentication
  • RADIUS
  • LDAP/Active Directory
  • SAML-based SSO

Choose the method that aligns with your organization’s security policy and implement it correctly to avoid login flaws.

Implementing Role-Based Access Control

Not every employee needs access to every part of the network. SonicWall VPN Login With role-based access control (RBAC), you can grant users only the permissions they need. This limits the attack surface and ensures that sensitive areas remain protected.

Steps to set up RBAC:

  1. Identify user roles within the organization.
  2. Define permissions associated with each role.
  3. Create corresponding user groups in the SonicWall system.
  4. Assign users to groups and test access before full deployment.

RBAC minimizes internal threats and ensures compliance with data protection regulations.

Enabling Multi-Factor Authentication (MFA)

Passwords alone are no longer sufficient. Multi-factor authentication adds an extra layer of security by requiring users to provide an additional credential, Login SonicWall VPN such as a code sent to their mobile device or generated through an authenticator app.

SonicWall integrates easily with MFA providers such as:

  • Google Authenticator
  • Microsoft Authenticator
  • Duo Security

To enable MFA:

  1. Navigate to the user settings.
  2. Choose the desired MFA method.
  3. Configure and test with a sample user.
  4. Roll out gradually across departments.

MFA significantly reduces the risk of account compromise, even if passwords are stolen.

Setting Up VPN Client Software Correctly

Employees connecting to the corporate network via SonicWall VPN should use only approved client software. SonicWall VPN Login SonicWall offers several client options, including:

  • Global VPN Client (GVC)
  • Mobile Connect
  • NetExtender

When setting up the client:

  1. Ensure the latest version is installed.
  2. Provide users with step-by-step installation and login instructions.
  3. Pre-configure server addresses and login protocols.
  4. Enable certificate-based authentication if possible.

Proper client configuration reduces user error and enhances connection security.

Enforcing Secure Password Policies

Organizations SonicWall VPN Login must implement a rigorous password policy for VPN access. Guidelines include:

  • Minimum password length of 12 characters
  • Combination of letters, numbers, and special characters
  • Prohibited use of personal information (birthdays, names, etc.)
  • Mandatory password changes every 90 days
  • No reuse of previous passwords

Regularly audit password strength using internal tools or third-party utilities. Encourage users to adopt password managers to generate and store secure credentials.

Monitoring and Logging VPN Activity

Continuous monitoring of login attempts and network activity is crucial. Login SonicWall VPN SonicWall provides logging and reporting features that allow administrators to:

  • Track user login times and locations
  • Monitor unsuccessful login attempts
  • Detect anomalies and potential breaches
  • Receive real-time alerts

Use these insights to identify suspicious behavior and act swiftly to mitigate risks. Implement automated tools to review logs and generate weekly reports for compliance auditing.

Limiting Concurrent Sessions and Idle Timeouts

To reduce the risk of hijacked SonicWall VPN Login sessions or abandoned VPN connections, set limits on:

  • Maximum concurrent sessions per user
  • Idle session timeouts
  • Connection duration

By enforcing session policies, organizations can automatically disconnect inactive users and prevent resource hogging.

Steps to configure timeouts:

  1. Access the VPN configuration settings.
  2. Set idle timeout to 10-15 minutes.
  3. Limit connection duration to a reasonable time window (e.g., 8 hours).
  4. Customize policies per user group if necessary.

This practice enhances security while optimizing server performance.

Using Certificate-Based Authentication

Certificate-based authentication is more secure than traditional usernames and passwords. SonicWall VPN Login Each user or device is issued a digital certificate, which is required to establish a VPN session.

To implement:

  1. Generate a public/private key pair.
  2. Install the certificate on the client device.
  3. Configure SonicWall to trust and validate client certificates.
  4. Test thoroughly before deploying organization-wide.

Certificates are difficult to spoof, offering robust identity verification and encryption.

Isolating VPN Traffic with VLANs and Firewalls

Segregating VPN traffic from the main network prevents lateral movement in case of compromise. SonicWall VPN Login Using Virtual LANs (VLANs) and firewall policies, administrators can:

  • Isolate sensitive systems from general users
  • Control data flow between different departments
  • Apply stricter rules to remote users

Define firewall rules to limit which applications or servers can be accessed through VPN connections. This reduces exposure and enforces the principle of least privilege.

Educating End Users

Even with the best configurations, human error remains a vulnerability. Educate staff on:

  • Recognizing phishing attempts
  • Using MFA and password managers
  • Installing client software correctly
  • Reporting suspicious login activity

Provide regular training sessions and send security newsletters to keep cybersecurity top of mind. Gamify learning through quizzes or certifications to boost engagement.

Establishing an Incident Response Plan

Despite all precautions, breaches can still happen. SonicWall VPN Login Have a documented incident response plan specifically for VPN-related events. The plan should include:

  1. Identification: Define how VPN compromises are detected.
  2. Containment: Outline steps to isolate affected accounts or devices.
  3. Eradication: Remove malware or rogue access.
  4. Recovery: Restore normal operations.
  5. Post-incident review: Analyze what went wrong and how to prevent recurrence.

Ensure that key personnel are trained and conduct simulations to test readiness.

Integrating VPN Security into Broader IT Strategy

VPN login security should not exist in a vacuum. SonicWall VPN Login Integrate it into a broader IT security framework, which includes:

  • Endpoint protection
  • Network segmentation
  • Data loss prevention
  • Mobile device management
  • Cloud security policies

Harmonize policies across departments and regularly assess risks using penetration tests and security audits.

Conclusion

With remote access becoming the norm in today’s business world, securing your network is more critical than ever. SonicWall offers a robust suite of tools for secure VPN connections, Login SonicWall VPN but it is ultimately up to the organization to enforce best practices that shield against potential threats.

By focusing on strong authentication, access controls, session management, and continuous monitoring, organizations can fortify their defenses. SonicWall VPN Login Empowering users through training and integrating VPN security into a holistic IT strategy ensures that the enterprise remains resilient, agile, and secure.